Are you ready to stand out in your next interview? Understanding and preparing for Esko Suite interview questions is a game-changer. In this blog, we’ve compiled key questions and expert advice to help you showcase your skills with confidence and precision. Let’s get started on your journey to acing the interview.
Questions Asked in Esko Suite Interview
Q 1. Describe your experience with Esko ArtiosCAD.
My experience with Esko ArtiosCAD spans over seven years, encompassing everything from basic die-line creation to advanced structural design. I’ve utilized it extensively for designing a wide array of packaging, including corrugated boxes, folding cartons, and displays. I’m proficient in using its tools for creating and editing die lines, adding various features like perforations, slots, and embossing, and creating 3D visualizations for client presentations. For example, I recently used ArtiosCAD to design a complex, multi-piece corrugated display for a major food retailer, optimizing the design for efficient production and minimal material waste. This involved leveraging ArtiosCAD’s powerful features for nesting and automation, resulting in significant cost savings for the client. I am also experienced with its integration with other Esko software, streamlining the entire packaging workflow.
Q 2. Explain the difference between die-cutting and creasing.
Die-cutting and creasing are both crucial processes in packaging production, but they serve different purposes. Die-cutting is the process of cutting through the material using a sharp blade, creating the final shape and size of the packaging. Think of it like using cookie cutters to create individual shapes from a sheet of dough. Creasing, on the other hand, involves scoring the material to create a pre-defined fold line. This allows for clean, accurate folds without causing the material to tear or crack, resulting in a professional finish. Imagine folding a piece of paper – the crease makes it easy to fold neatly. In Esko ArtiosCAD, we define both these elements, ensuring the die-cutter knows exactly where to cut and where to crease for perfect results. A poorly designed crease can ruin an otherwise perfect packaging piece, highlighting the importance of precise creasing in the overall design.
Q 3. How familiar are you with Esko Studio and its features?
I’m highly familiar with Esko Studio, particularly its capabilities for artwork preparation and proofing. I’ve used it extensively for tasks such as:
- Artwork editing and retouching: Ensuring the artwork is print-ready, adjusting colors, and ensuring correct resolution.
- Preflighting: Identifying and resolving potential print errors before sending the job to production, saving time and resources.
- Proofing and color management: Generating soft and hard proofs to ensure color consistency and accuracy across various substrates and printing methods.
- Collaboration features: Effectively sharing files and proofs with clients for quick approval cycles.
Q 4. How do you manage color consistency across different print processes using Esko?
Maintaining color consistency across different print processes using Esko involves a multi-faceted approach. Esko’s color management tools within Studio and its integration with other software like Color Engine are crucial. This ensures that the colors specified in the design are accurately reproduced regardless of the printing method (offset, flexo, digital) or substrate used. This involves:
- Using color profiles: Defining the color spaces for different printing devices and ensuring accurate conversion between them.
- Soft proofing: Using Esko Studio to simulate the printed output on different substrates and printing conditions.
- Hard proofing: Creating physical proofs to match the final output as closely as possible.
- Collaboration and communication: Clear communication with the printer regarding color standards and expectations.
Q 5. What is your experience with Esko WebCenter?
My experience with Esko WebCenter focuses primarily on its role in streamlining the packaging approval workflow. I’ve utilized it to efficiently manage the review and approval of packaging designs by clients and internal stakeholders. The system facilitates online proofing, version control, and secure file sharing, significantly reducing turnaround time and improving overall efficiency. For instance, a recent project involved multiple rounds of revisions from a client located overseas. WebCenter allowed us to seamlessly share proofs, track feedback, and implement changes quickly, drastically reducing the project timeline compared to traditional methods.
Q 6. Describe your workflow for creating a packaging design in Esko.
My typical workflow for creating a packaging design in Esko involves several key steps:
- Design concept and client briefing: Gathering all necessary information regarding the product, target audience, and branding guidelines.
- Structural design in ArtiosCAD: Creating the die-line and defining all structural elements such as flaps, creases, and perforations.
- Artwork creation and preparation in Adobe Illustrator or Photoshop: Developing the artwork and ensuring it is print-ready.
- Artwork integration into ArtiosCAD: Placing the artwork onto the die-line, ensuring accurate positioning and scaling.
- Preflighting and trapping in Studio: Checking for errors and preparing the files for optimal print results.
- Color management and proofing in Studio: Ensuring color consistency across different printing methods.
- Client review and approval using WebCenter: Sharing proofs with the client for review and feedback.
- Final file preparation for production: Exporting the files in the required format for the printer.
Q 7. How do you handle preflighting and trapping in Esko?
Preflighting and trapping are critical steps to ensure high-quality print output in Esko. Preflighting is a crucial quality control measure that involves checking the files for any errors or inconsistencies that may cause printing problems. This might include checking for low-resolution images, color profiles, font issues, and other potential problems. Esko Studio’s preflight capabilities automate this process, providing a detailed report of any issues found. Trapping is the process of overlapping colors slightly to prevent gaps between them, especially important in processes like flexographic printing. Esko’s trapping tools automate the process, ensuring the precise overlap needed for a clean print. Effectively utilizing these features significantly reduces the risk of print errors and ensures a high-quality final product. Ignoring these steps can result in costly reprints and project delays, highlighting their importance in a professional packaging design workflow.
Q 8. Explain your understanding of variable data printing within the Esko Suite.
Variable Data Printing (VDP) in Esko Suite allows for the personalized creation of packaging, labels, and other printed materials. Imagine printing thousands of cereal boxes, each with a unique prize code or personalized message. That’s VDP. Esko achieves this through its integration with data sources, allowing you to merge variable data, such as customer names, addresses, images, or serial numbers, with your pre-designed template. This is typically done within applications like ArtPro+, where you define data fields within your design and link them to external data sources, like a CSV or database file. The system then automatically generates unique outputs based on the data provided. Esko’s workflow ensures the correct data is merged flawlessly with the design, avoiding common errors like mismatched images or incorrect text. A key advantage is the ability to manage and verify the data-to-design mapping before printing, preventing costly mistakes and ensuring a high-quality, personalized final product. For example, you could use VDP to create unique QR codes on each product, linking to specific product information or promotional offers.
Q 9. How do you troubleshoot common issues encountered in Esko software?
Troubleshooting Esko software involves a systematic approach. First, I always check the obvious: are the files properly formatted and linked? Are the necessary plugins installed and updated? Common issues often stem from incorrect file paths, missing fonts, or incorrect color profiles. I’d start with Esko’s built-in diagnostic tools, checking for error logs. The logs usually provide clues to the underlying problem. Next, I’ll examine the workflow and look for bottlenecks or potential conflicts between modules. For instance, if I have a problem in Automation Engine, I’ll meticulously review the job ticket, checking for incorrect configurations or missing steps. Finally, Esko’s online support documentation and community forums are invaluable resources for finding solutions and troubleshooting specific error messages. If the issue persists, Esko’s customer support team provides expert assistance to resolve more complex problems.
Q 10. What is your experience with Esko Automation Engine?
My experience with Esko Automation Engine is extensive. I’ve used it to automate various prepress tasks, significantly improving efficiency and reducing manual intervention. I’ve designed and implemented complex workflows involving multiple Esko applications, external software, and job management systems. Automation Engine allows for seamless integration and automation of tasks such as file preflighting, trapping, imposition, and color management. A real-world example was streamlining the packaging production for a major food company. We automated the entire process from design approval to plate output, drastically reducing turnaround times and minimizing human error. This involved setting up custom jobs within Automation Engine, integrating with their existing MIS system, and using hotfolders for automated file processing. My understanding extends to advanced features like job ticketing, custom scripting (using JavaScript), and integration with other third-party systems for greater automation control.
Q 11. Describe your experience with different Esko modules (e.g., DeskPack, Cape Pack).
I’m proficient in several Esko modules. DeskPack, for example, is an invaluable tool for creating cutting-dies and other packaging design elements. I regularly use its features for creating intricate shapes, adding bleed and margins, and generating accurate die-lines. Cape Pack is crucial for structural design. I use it to create realistic 3D models of packaging, ensuring accurate fit and functionality before proceeding to printing. I’ve worked extensively with ArtPro+ for prepress preparation, including color separation, imposition, and the creation of print-ready files. Furthermore, I’m familiar with other Esko products like Studio and WebCenter, which are valuable for collaborative design and workflow management. My experience across these different modules allows me to create efficient and integrated workflows, minimizing handoffs and ensuring consistent quality throughout the packaging production process.
Q 12. How do you ensure the accuracy of your designs in Esko?
Ensuring design accuracy in Esko involves a multi-faceted approach. Firstly, I meticulously check all design elements against the client’s specifications and brand guidelines. This includes verifying colors, fonts, and image resolutions. Esko’s built-in preflighting tools are essential here, flagging potential issues like missing fonts, incorrect color spaces, or low-resolution images. I use the preflight profiles tailored to the specific printing method to catch any potential issues early on. Furthermore, I utilize Esko’s proofing tools to create digital proofs, allowing for comprehensive review and client approval before proceeding to platemaking. This reduces costly reprintings and ensures the final product meets the expected quality standards. Finally, utilizing version control within the workflow is crucial to ensure the final design is the correct version and the design assets are tracked.
Q 13. How do you optimize files for different printing methods within the Esko workflow?
Optimizing files for different printing methods within Esko involves understanding the specific requirements of each process. For example, files destined for flexographic printing require careful consideration of line screens, halftone dots, and color separation. I would adjust the settings in ArtPro+ to achieve optimal results for this process. Offset printing has different requirements, demanding precise color management and trapping techniques to prevent misregistration. For digital printing, I focus on optimizing file resolution and ensuring color profiles are appropriate for the specific digital press. This involves configuring the output settings in Esko to match the printing method and the specific requirements of the press. Each printing method has its own set of best practices that need to be followed to achieve optimal quality. I apply these best practices within the Esko workflow to ensure that the printed output meets the highest possible standard.
Q 14. Explain your knowledge of different file formats used in packaging prepress.
In packaging prepress, we encounter various file formats. PDF is the most common, specifically PDF/X-1a for high-fidelity color representation. TIFF is frequently used for high-resolution images. EPS (Encapsulated PostScript) is used for vector graphics, while AI (Adobe Illustrator) and PSD (Adobe Photoshop) are native design files that are often prepped in Esko. Understanding the strengths and limitations of each format is vital. For instance, PDF/X-1a ensures color consistency across different systems, while TIFF offers high image quality. It is essential to choose the appropriate file format for each stage of the workflow to ensure compatibility and data integrity. The choice of the file format depends on the printing method, the software used and the specific requirements for the job. Improper file format can lead to errors in the printing process.
Q 15. How familiar are you with color management profiles (e.g., ICC profiles) in Esko?
Color management is crucial in ensuring consistent color reproduction across different devices and processes. In Esko, ICC profiles (International Color Consortium profiles) are the cornerstone of this. These profiles act like a translator, describing the color characteristics of a specific device (scanner, printer, monitor) and allowing Esko software to accurately convert colors between different color spaces (e.g., RGB to CMYK). For example, an ICC profile for a specific flexographic press will tell Esko precisely how that press renders various CMYK ink combinations. Without proper profiles, the colors you see on screen might differ significantly from the printed output.
My familiarity extends to creating custom profiles, particularly for specialized inks and substrates, using spectrophotometers and profile creation software. I also possess deep knowledge of managing and assigning the correct profiles to different projects based on their output requirements and the printing method, ensuring consistent color throughout the workflow. I understand the implications of different color spaces like Adobe RGB, sRGB, and various CMYK variations and select them carefully to avoid color shifts during the design and prepress stages. This involves understanding gamut mapping and the limitations of different color spaces.
Career Expert Tips:
- Ace those interviews! Prepare effectively by reviewing the Top 50 Most Common Interview Questions on ResumeGemini.
- Navigate your job search with confidence! Explore a wide range of Career Tips on ResumeGemini. Learn about common challenges and recommendations to overcome them.
- Craft the perfect resume! Master the Art of Resume Writing with ResumeGemini’s guide. Showcase your unique qualifications and achievements effectively.
- Don’t miss out on holiday savings! Build your dream resume with ResumeGemini’s ATS optimized templates.
Q 16. Describe your experience with creating and managing templates in Esko.
Creating and managing templates in Esko is a cornerstone of efficient packaging production. I have extensive experience building templates within applications like Studio and PackEdge2. My approach emphasizes modularity and reusability. A well-structured template significantly reduces production time and minimizes errors. For instance, a template for a folding carton might include pre-defined bleed areas, cut lines, crease lines, and even initial design elements. I build in variables for things like product name and batch numbers to allow for quick customization.
Managing templates involves a robust system of version control and naming conventions. I typically use a clear naming structure (e.g., ClientName_ProductName_VersionNumber.esko) and regularly back up template files. Further, I leverage Esko’s features to manage template libraries, making them easily accessible to the team and reducing redundancy. I also ensure that all templates are thoroughly tested and documented so everyone can use them effectively. Recently, for a large beverage company, I created a library of over 20 templates for different carton sizes, ensuring consistency and efficiency across their diverse product range.
Q 17. What is your understanding of the importance of imposition in packaging printing?
Imposition, in packaging printing, is the precise arrangement of individual printed sheets (or labels) onto a larger printing sheet to optimize material usage and achieve the most efficient print run. It’s akin to solving a complex jigsaw puzzle, but with significant implications for cost and production time. Improper imposition can lead to wasted materials, increased printing costs, and potential errors in the final product.
In Esko, applications like Automation Engine play a crucial role in imposition. They allow for the automated creation of imposition layouts, considering factors such as sheet size, number of products per sheet, waste margins, and registration marks. This minimizes manual effort and greatly reduces the risk of human error. I’m proficient in creating different imposition schemes based on print technology and packaging type. For example, I’ll use different imposition strategies for a sheet-fed press compared to a web press, taking into account differences in sheet size, web width and speed.
Q 18. How do you use Esko to collaborate with other team members on a project?
Collaboration is vital in a packaging workflow. Esko facilitates this through various methods. We utilize features like shared libraries for templates and artwork, allowing multiple team members to access and utilize standardized assets. For example, our team shares a centralized library of approved logos and brand assets.
Additionally, Esko’s workflow automation features, such as the Automation Engine, allow us to create a collaborative workflow where each stage of the process is clearly defined, tracked, and approved by the relevant team member. Tools like online proofing and approval systems allow for seamless review and feedback on designs. I often use this functionality to streamline projects, ensuring swift design approvals from clients and internal stakeholders. I also encourage the use of clear communication channels to coordinate our work effectively.
Q 19. How do you handle design revisions and version control in Esko?
Design revisions and version control are managed meticulously in Esko. We primarily leverage the built-in version history feature within each Esko application. Every change made to a file creates a new version, which can be easily retrieved and compared. This is critical for tracking progress, reverting to earlier versions if needed, and demonstrating accountability for design changes. I’ve also implemented a strict naming convention for files, including version numbers, which ensures that everyone knows which version they are working with.
Further, we utilize a centralized file management system, often integrated with a digital asset management (DAM) system, which acts as a single source of truth for all project files. This enables clear version history, facilitates collaboration and reduces the risk of working on outdated versions. Using this system, the entire team can access the most recent version of a design, preventing confusion and errors.
Q 20. Describe your approach to problem-solving when encountering unexpected errors in Esko.
Troubleshooting in Esko requires a systematic approach. My first step is always to carefully examine the error message, paying attention to specific details like error codes and file paths. I then refer to Esko’s documentation and online resources to find potential solutions. If the error message isn’t clear, I try to isolate the problem by systematically disabling plugins or components of the project. A common strategy is to try replicating the error using a smaller, simpler file to pinpoint the source of the issue.
If the problem persists, I consult Esko’s support resources and forums. I have personally resolved numerous complex issues through this community engagement, learning from others’ experiences and gaining insights from Esko experts. If necessary, I’ll create a detailed documentation of the error including screenshots, logs, and steps to reproduce the issue, before contacting Esko support directly to escalate the problem. This structured approach has consistently helped me resolve even the most challenging problems promptly.
Q 21. How familiar are you with Esko’s cloud-based solutions?
I’m familiar with Esko’s cloud-based solutions, particularly those focused on collaboration and workflow automation. These solutions enhance collaboration among internal teams and with external partners by providing secure cloud storage for design files, workflows, and project data. This allows for real-time access and collaboration from anywhere with an internet connection. I’ve used such cloud features to share project files, track revisions, and allow remote clients to provide feedback and approval efficiently.
The cloud-based offerings offer benefits like increased scalability, data security, and enhanced accessibility. They simplify data management and streamline workflows, reducing reliance on local servers and improving overall efficiency. While I haven’t had hands-on experience with all aspects of Esko’s cloud solutions, my understanding of their functionalities and benefits ensures I’m prepared to adopt and integrate them into my workflow.
Q 22. What is your experience with integrating Esko with other MIS or ERP systems?
Integrating Esko with other MIS (Manufacturing Information Systems) or ERP (Enterprise Resource Planning) systems is crucial for streamlining the entire packaging production workflow. This integration allows for seamless data flow between design, prepress, and production. I’ve extensive experience in this area, having worked on numerous projects integrating Esko with various systems like SAP, Oracle, and industry-specific MIS solutions. The integration typically involves using APIs and data exchange formats like XML or JSON to transfer information such as job details, artwork specifications, and production schedules.
For example, in one project, we integrated Esko Automation Engine with an SAP system. This enabled automatic job creation in Esko based on order details from SAP, eliminating manual data entry and minimizing errors. Another project involved using a custom-built connector to transfer color profiles and artwork approvals between Esko and a smaller, specialized MIS system. Each integration is unique and requires careful planning and testing to ensure a smooth and efficient data flow.
Challenges often involve data mapping, ensuring data integrity, and handling potential discrepancies between system formats. However, the benefits of a well-integrated system far outweigh these challenges, leading to improved productivity, reduced errors, and increased visibility across the entire supply chain.
Q 23. Describe your experience with different types of packaging (e.g., folding cartons, flexible packaging).
My experience encompasses a wide range of packaging types, including folding cartons, flexible packaging (pouches, films, labels), corrugated boxes, and rigid containers. I’m proficient in using Esko’s software to design and prepare artwork for each type. For example, when working with folding cartons, I use Esko’s ArtiosCAD to create structural designs and ensure proper die-cutting, while for flexible packaging, I leverage Studio to create and prepare artwork for different printing techniques like flexography or gravure.
The differences in substrate and printing techniques require different approaches in Esko. For example, preparing artwork for a flexible film requires careful consideration of the substrate’s transparency and potential for distortion, which often necessitates the use of specific trapping and color management techniques. Corrugated board requires attention to its strength and ability to hold print, whereas folding cartons demand precise design for folding and gluing. I have a thorough understanding of these nuances and tailor my approach to each packaging type, ensuring optimal results.
Q 24. How do you handle the creation and management of digital proofs in Esko?
Esko’s WebCenter is the central hub for managing digital proofs. I utilize it to create and distribute proofs to clients for approval. The process typically involves creating a high-resolution PDF proof from the prepared artwork in either Studio or ArtiosCAD. This proof is then uploaded to WebCenter, where it’s accessible to clients for review and approval.
WebCenter offers collaborative tools, allowing clients to annotate directly on the proof and communicate their feedback. This streamlined process eliminates the need for physical proofs, reducing costs, improving turnaround time, and fostering better communication. Once approval is received, the proof is archived within WebCenter, creating an auditable record of the entire approval process. This ensures traceability and prevents any future disputes concerning artwork accuracy.
Q 25. Explain your understanding of the impact of different substrates on the printing process.
Different substrates significantly impact the printing process. The substrate’s absorbency, surface texture, and opacity all influence ink adhesion, color reproduction, and the overall print quality. For instance, coated paper provides a smoother surface resulting in sharper and more vibrant colors compared to uncoated paper, which tends to absorb more ink, potentially leading to duller colors and a higher risk of feathering.
Understanding substrate properties is crucial for selecting appropriate inks and printing techniques. In Esko, we account for these variations by adjusting color profiles and printing settings based on the specific substrate. For instance, when printing on corrugated board, we might need to adjust the ink density to ensure the print is clearly visible, and to avoid the ink being absorbed too deeply. My experience allows me to anticipate these challenges and optimize the prepress process accordingly, ensuring consistency and quality across different substrates.
Q 26. Describe your approach to ensuring high-quality output in Esko.
Ensuring high-quality output in Esko involves a multi-faceted approach focusing on several key areas: accurate color management, precise trapping, proper image resolution, and thorough preflighting. I utilize Esko’s color management tools to create consistent and accurate color reproduction across different devices and substrates.
I diligently check for potential issues during preflighting, identifying and correcting errors such as missing fonts, low-resolution images, and incorrect trapping before sending the job to print. This proactive approach significantly reduces the risk of costly mistakes during production. For instance, I always check for proper image resolution, ensuring that images are at least 300 DPI for optimal print quality. Also, I always check for correct bleed and trim marks to avoid any issues during cutting and finishing stages.
Q 27. What are your preferred methods for quality control in the Esko workflow?
My preferred methods for quality control within the Esko workflow incorporate a combination of automated checks and manual inspections. Preflighting software, an integral part of Esko, helps automate the detection of potential errors in the artwork. This includes checks for missing fonts, low-resolution images, color inconsistencies, and other common prepress problems.
Beyond automated checks, I perform manual inspections at various stages. This includes checking for accurate color profiles, verifying the accuracy of trapping and die-lines in ArtiosCAD, and reviewing the final digital proof meticulously before approval. By combining automated and manual quality control measures, I can effectively minimize errors and ensure consistent, high-quality output.
Q 28. How do you stay updated with the latest features and developments in Esko Suite?
Staying updated with the latest Esko features and developments is a continuous process. I actively participate in Esko’s training programs, webinars, and online resources. I regularly review Esko’s online documentation and user forums to stay informed about new functionalities and best practices.
Additionally, I attend industry trade shows and conferences to network with other professionals and learn about the latest trends and advancements in packaging production. Subscription to Esko’s newsletters and participation in user groups keep me updated on new releases and upcoming features, allowing me to proactively adapt my workflows and enhance my skills.
Key Topics to Learn for Your Esko Suite Interview
- Prepress Workflow: Understand the entire prepress process within Esko Suite, from initial design to plate output. Consider the role of each module and how they integrate.
- Artwork Handling & Automation: Explore how Esko Suite automates tasks like trapping, imposition, and color management. Be prepared to discuss real-world examples of improving efficiency through automation.
- Packaging Design & Structural Design: Familiarize yourself with the design and structural capabilities within the Esko Suite. Be ready to discuss creating and modifying packaging designs, including 3D visualization and prototyping.
- Color Management & Proofing: Master the principles of color management within Esko Suite. Understand how to create accurate soft and hard proofs and the importance of color consistency throughout the workflow.
- Platemaking & Output: Gain a solid understanding of the platemaking process and how Esko Suite integrates with various platemaking technologies. Be prepared to discuss best practices for optimal plate output.
- Esko WebCenter & Collaboration: Understand how Esko WebCenter facilitates collaboration and approval workflows. Be able to discuss its role in streamlining communication and improving efficiency.
- Problem-solving and Troubleshooting: Practice identifying and resolving common issues within the Esko Suite workflow. Think about how you would approach troubleshooting scenarios and demonstrate your problem-solving skills.
Next Steps
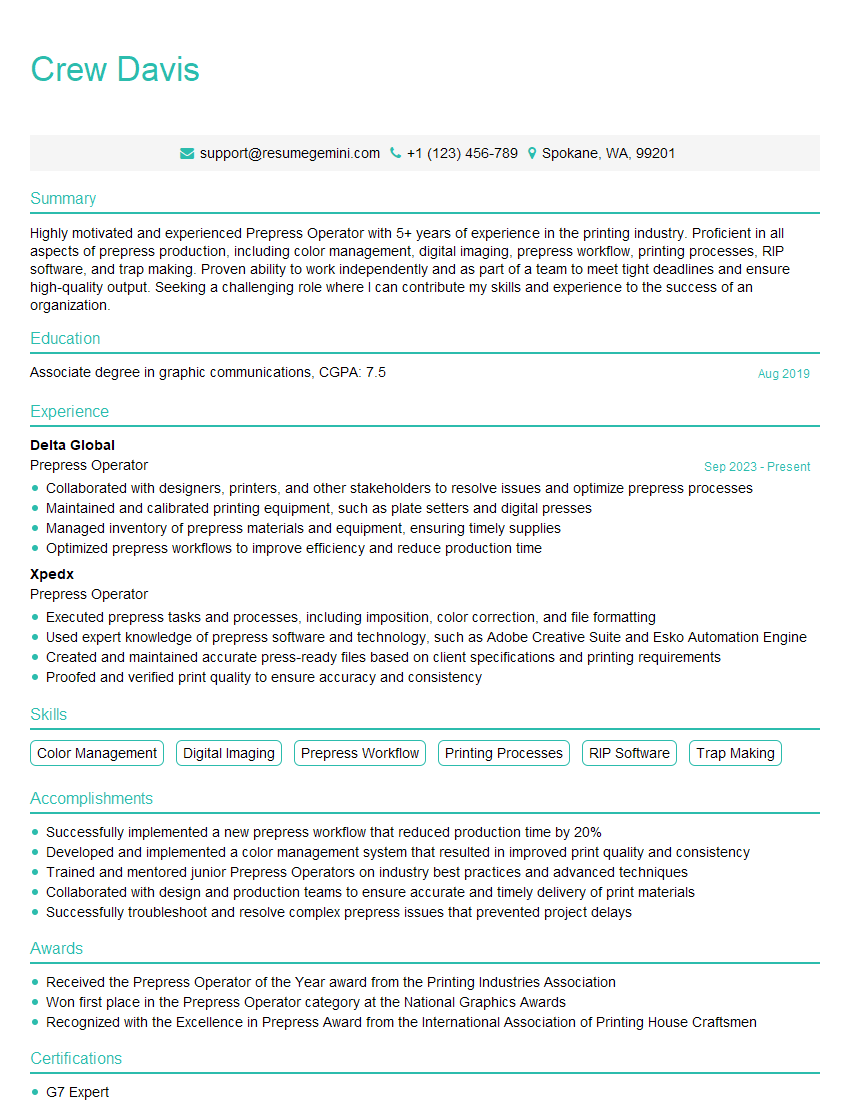
Mastering Esko Suite opens doors to exciting opportunities in the packaging and print industries, significantly boosting your career prospects. To make the most of these opportunities, invest time in creating a strong, ATS-friendly resume that highlights your Esko Suite skills and experience. ResumeGemini is a trusted resource to help you build a professional and impactful resume. We provide examples of resumes tailored to Esko Suite roles to guide you in creating your own compelling application. Take the next step towards your dream job – build your best resume today!
Explore more articles
Users Rating of Our Blogs
Share Your Experience
We value your feedback! Please rate our content and share your thoughts (optional).
What Readers Say About Our Blog
Hi, I’m Jay, we have a few potential clients that are interested in your services, thought you might be a good fit. I’d love to talk about the details, when do you have time to talk?
Best,
Jay
Founder | CEO
