Preparation is the key to success in any interview. In this post, we’ll explore crucial Grind and shape tools to precise tolerances interview questions and equip you with strategies to craft impactful answers. Whether you’re a beginner or a pro, these tips will elevate your preparation.
Questions Asked in Grind and shape tools to precise tolerances Interview
Q 1. Explain the difference between cylindrical and surface grinding.
Cylindrical grinding and surface grinding are both subtractive manufacturing processes that use abrasive wheels to remove material, but they differ significantly in how they achieve this. Cylindrical grinding, as the name suggests, focuses on generating cylindrical shapes. The workpiece rotates on its axis while the grinding wheel, often shaped as a cup or straight wheel, traverses its length. This process is ideal for creating shafts, rollers, and other cylindrical components requiring high precision. Surface grinding, on the other hand, involves a flat grinding wheel moving across a stationary or slowly moving workpiece. This method is preferred for planar surfaces, creating flat and parallel surfaces on parts like plates, blocks, and machine beds. Think of it like this: cylindrical grinding is like sharpening a pencil, removing material along the length to achieve a cylindrical shape, whereas surface grinding is like smoothing a tabletop to create a perfectly flat surface.
The key differences lie in the orientation of the workpiece and the shape of the grinding wheel, leading to different applications and capabilities. Cylindrical grinding offers superior roundness and straightness, while surface grinding excels at achieving flatness and parallelism.
Q 2. Describe the various types of grinding wheels and their applications.
Grinding wheels are classified by their bonding material, abrasive material, grain size, and structure. The choice of wheel significantly impacts the grinding process and the final surface finish.
- Abrasive Material: Common abrasives include aluminum oxide (Al2O3) for general-purpose grinding, silicon carbide (SiC) for hard and brittle materials, and cubic boron nitride (CBN) and diamond for extremely hard materials like hardened steels and ceramics.
- Bonding Material: The bonding material holds the abrasive grains together. Vitrified bonds are the most common, offering good strength and heat resistance. Resinoid bonds are more flexible and offer faster cutting rates, suitable for high-speed grinding. Metallic bonds are used for heavy-duty applications. Rubber bonds are flexible and used for delicate materials.
- Grain Size: Represented by numbers, this indicates the size of the abrasive grains. Larger grain sizes (smaller numbers) are used for roughing, while smaller grain sizes (larger numbers) are for finishing.
- Structure: This refers to the porosity of the wheel, impacting the chip removal rate and surface finish. Open structures allow for better chip clearance, reducing heat buildup, while denser structures provide a finer finish.
Applications: A coarse aluminum oxide wheel with a vitrified bond and open structure would be suitable for rough grinding steel. Conversely, a fine silicon carbide wheel with a resinoid bond and a dense structure would be more appropriate for polishing ceramic tiles. The correct wheel selection is crucial for efficient material removal and achieving the desired surface finish and tolerances.
Q 3. What are the key factors influencing surface finish in grinding?
The surface finish in grinding is determined by several interconnected factors.
- Grinding Wheel Selection: As discussed earlier, the grain size, bond type, and structure of the wheel significantly influence surface roughness. Finer grain sizes and denser structures result in smoother surfaces.
- Grinding Speed: Higher speeds generally improve material removal rates but can also lead to increased surface roughness due to excessive heat and burn. A balance must be achieved.
- Workpiece Material: The hardness and machinability of the workpiece influence the surface finish. Harder materials may require more aggressive grinding, potentially increasing roughness.
- Coolant Application: Proper coolant application is crucial for controlling heat buildup and preventing burn. Coolant selection depends on the workpiece material and grinding operation.
- Dressing and Truing: Regular dressing and truing of the grinding wheel maintains its shape and sharpness, leading to better surface finish and reduced surface imperfections.
- Feed Rate: The rate at which the workpiece is fed into the grinding wheel affects the material removal rate and the surface finish. Too fast a feed rate may create surface defects.
For instance, grinding hardened steel to a mirror finish requires a fine-grit diamond wheel, slow speeds, copious coolant application, and precise control over feed rates. Conversely, rough grinding a cast iron component can tolerate a coarser wheel and faster speeds.
Q 4. How do you measure and control tolerances during a grinding operation?
Tolerance control during grinding is essential. We use a variety of methods to measure and maintain tolerances.
- Pre-Grinding Measurement: The workpiece is carefully measured before grinding to establish a baseline. This aids in determining the amount of material removal required.
- In-Process Measurement: During the grinding process, various measuring instruments may be used, including dial indicators, micrometers, and optical comparators. This enables real-time monitoring of dimensions.
- Post-Grinding Measurement: Following grinding, precise measurements are taken to verify that the final dimensions conform to the specified tolerances. This often involves coordinate measuring machines (CMMs) for complex parts.
- Automatic Grinding Machines: Modern CNC grinding machines use feedback loops and automated control systems to maintain consistent tolerances during operation. These machines are programmed with the target dimensions and automatically adjust the grinding parameters to maintain them.
- Statistical Process Control (SPC): SPC charts are used to track dimensional data over time, identifying trends and potential issues in the grinding process that could affect the ability to control tolerances.
For example, in a production setting manufacturing precision shafts, CMMs are regularly used to check roundness, straightness, and diameter tolerances of the final product. Any deviation from the tolerances will necessitate adjustments to the grinding parameters or corrective actions to meet specifications.
Q 5. What are the common causes of grinding wheel wear and how can they be mitigated?
Grinding wheel wear is inevitable, but its rate and nature can be influenced. Common causes include:
- Excessive Heat: Heat generated during grinding can cause the bonding material to degrade, leading to wheel wear and glazing (the clogging of pores with material). Proper coolant application is crucial to mitigate this.
- Incorrect Wheel Selection: Using an inappropriate wheel for the workpiece material or operation can result in rapid wear. For instance, using a soft wheel on a hard material leads to accelerated wear.
- Improper Grinding Techniques: Incorrect feed rates, excessive downfeed, or inconsistent grinding can accelerate wear. Overloading the wheel leads to faster material removal, but also to more damage.
- Contamination: Dirt, chips, or other foreign particles can embed in the wheel, leading to uneven wear and damage.
- Wheel Storage: Poor storage of wheels can lead to cracking, damage to the bond and therefore reduced life.
Mitigation Strategies: Employing the right coolant and wheel selection, optimizing grinding parameters, using effective wheel dressing and truing, and keeping a clean working environment are key to extending wheel life and ensuring consistent grinding performance.
Q 6. Explain the importance of wheel dressing and truing.
Wheel dressing and truing are crucial maintenance procedures to ensure the grinding wheel maintains its shape and sharpness. Undressed or untrued wheels lead to poor surface finish, inconsistent tolerances, and increased wear.
Dressing: Dressing is the process of removing dull or clogged abrasive grains from the wheel’s surface, using a dressing tool (a diamond or carbide dresser). It sharpens the wheel and restores its cutting ability. Think of it like sharpening a knife. A dull knife won’t cut cleanly.
Truing: Truing is the process of restoring the wheel’s shape and size. This ensures the wheel consistently removes material across its entire surface, preventing uneven wear and improving tolerance control. Truing is often achieved with a diamond dresser, precisely controlled to maintain specific wheel dimensions.
Regular dressing and truing are crucial for maintaining dimensional accuracy, achieving consistent surface finish, and extending the grinding wheel’s service life. A poorly maintained wheel can lead to scrapped parts and significant downtime.
Q 7. Describe the process of setting up a grinding machine for a specific job.
Setting up a grinding machine for a specific job is a systematic process.
- Workpiece Preparation: The workpiece needs to be securely clamped or fixtured in place, ensuring stability and preventing vibrations during grinding.
- Wheel Selection: The appropriate grinding wheel is selected based on the workpiece material, desired surface finish, and required material removal rate.
- Machine Setup: The machine parameters are set, including wheel speed, work speed, feed rate, and depth of cut. These settings are crucial for efficient grinding and achieving the desired tolerances.
- Coolant System: The coolant system is activated, ensuring adequate flow and pressure to keep the wheel and workpiece cool and prevent burning. The correct coolant must be used for the workpiece material.
- Test Run: A test run is conducted using a scrap piece of similar material to verify the machine setup and optimize the parameters. This prevents damage to the workpiece and ensures optimal performance.
- Final Grinding: The actual workpiece is then ground, closely monitoring dimensional progress and making adjustments as needed. This is where careful attention to detail is vital.
For example, when grinding a camshaft, the fixture must precisely hold the part during the grinding cycle. Careful attention to the wheel’s profile is critical for replicating the cam’s geometry accurately. A test run is essential to confirm the accuracy of the profile before machining the actual part.
Q 8. How do you select the appropriate coolant for a grinding operation?
Coolant selection in grinding is crucial for efficiency, surface finish, and tool life. The choice depends on several factors: the workpiece material, the grinding wheel type, and the desired outcome. For example, grinding steel might require a different coolant than grinding aluminum.
- Material Compatibility: Some coolants are aggressive and can react with certain materials, causing corrosion or discoloration. A water-soluble coolant is often preferred for ferrous metals, while a more specialized oil-based coolant might be necessary for materials sensitive to water.
- Grinding Wheel Type: The wheel’s bond and abrasive type influence coolant selection. A resinoid bond wheel might operate well with a low-viscosity coolant, whereas a vitrified bond wheel might need something with better lubricating properties.
- Desired Finish: For a mirror-like surface finish, a coolant with excellent lubrication and cooling properties is crucial to prevent burning or excessive heat buildup. A coarser finish might allow for less stringent coolant choices.
- Environmental Concerns: Modern practices emphasize environmentally friendly coolants. Synthetic coolants offer a balance of performance and reduced environmental impact compared to traditional oil-based coolants.
Selecting the right coolant often involves testing different options on a small sample to determine which provides the best performance and finish for the specific application. It’s a process of iterative improvement, guided by the material properties and the desired results.
Q 9. What safety precautions are essential when operating grinding machines?
Safety is paramount when operating grinding machines. These machines can be dangerous if not handled correctly. Here are some essential safety precautions:
- Eye Protection: Always wear safety glasses or a face shield. Grinding generates flying debris that can cause serious eye injuries.
- Hearing Protection: Grinding machines are noisy. Ear plugs or muffs are necessary to protect hearing from long-term damage.
- Proper Clothing: Wear close-fitting clothing to prevent it from getting caught in the machine. Avoid loose sleeves or jewelry.
- Machine Guards: Ensure all guards are in place and functioning correctly. They protect the operator from flying debris and accidental contact with rotating parts.
- Workpiece Securement: The workpiece must be securely clamped or held to prevent it from moving unexpectedly during the grinding operation.
- Regular Inspection: Inspect the machine regularly for any signs of wear or damage. Report any issues immediately.
- Emergency Stop: Familiarize yourself with the location and operation of the emergency stop button.
- Training: Proper training is essential before operating any grinding machine. Understand the machine’s controls, safety features, and operating procedures.
Remember, a moment’s carelessness can lead to severe injury. Prioritizing safety is not just a precaution; it’s a fundamental requirement for working with grinding machines.
Q 10. How do you troubleshoot common grinding machine problems?
Troubleshooting grinding machine problems requires a systematic approach. Begin by identifying the symptom, then investigate the potential causes. Here’s a step-by-step process:
- Identify the Problem: Is the workpiece not being ground to the correct dimensions? Is the surface finish unsatisfactory? Is there excessive vibration? Clearly defining the problem is the first step.
- Check the Obvious: Ensure the machine is properly set up, the grinding wheel is correctly dressed and trued, the coolant flow is adequate, and the workpiece is properly secured.
- Wheel Condition: Inspect the grinding wheel for wear, glazing, or loading. A worn or damaged wheel can lead to poor performance and inaccurate results. Consider replacing the wheel if necessary.
- Machine Alignment: Check the alignment of the machine components. Misalignment can cause vibrations and inaccurate grinding. This might require professional calibration.
- Workpiece Material: The hardness or other properties of the workpiece material may impact grinding performance. Ensure the chosen grinding wheel is appropriate for the material.
- Coolant: Verify that the correct coolant is being used and that the flow rate is sufficient. Insufficient coolant can lead to wheel glazing and burning.
- Cutting Parameters: Review the grinding parameters (depth of cut, feed rate, speed) to ensure they are appropriate for the material and desired finish.
- If the Problem Persists: Seek professional assistance from a qualified technician or the machine manufacturer.
Documenting each step of the troubleshooting process is crucial, both for solving the current problem and for preventing future issues. Keeping a logbook of machine maintenance and troubleshooting efforts can be invaluable.
Q 11. Explain the concept of material removal rate in grinding.
Material removal rate (MRR) in grinding refers to the volume of material removed per unit of time. It’s a key performance indicator that reflects the efficiency of the grinding process. MRR is influenced by various factors:
- Wheel Speed: Higher wheel speeds generally result in higher MRR.
- Downfeed Rate: The rate at which the wheel is advanced into the workpiece significantly impacts MRR.
- Workpiece Speed: The speed at which the workpiece moves across the wheel can affect MRR.
- Wheel Type: The type of grinding wheel (abrasive, bond, grain size) greatly influences the rate of material removal.
- Workpiece Material: The hardness and machinability of the workpiece material affect how easily material is removed.
- Coolant: The use of an appropriate coolant can increase MRR by improving heat dissipation and reducing wheel wear.
Calculating MRR often involves measuring the volume of material removed (length x width x depth) and dividing it by the grinding time. The formula is not standardized; it varies slightly depending on the specific grinding method and how the relevant parameters are measured.
Optimizing MRR is a balancing act. While a high MRR is desirable for productivity, excessively high rates can lead to poor surface finish, excessive wheel wear, and potential damage to the workpiece. A careful consideration of all influencing factors is essential.
Q 12. Describe different methods for measuring surface roughness.
Surface roughness is a critical aspect of many grinding operations. Several methods exist for measuring it:
- Profilometry: A profilometer uses a stylus to trace the surface profile, providing a detailed representation of surface irregularities. This method is accurate but can be time-consuming and potentially damaging to delicate surfaces.
- Optical Profilometry: Optical methods, such as confocal microscopy or interferometry, use light to measure surface features. These are non-contact methods, offering high resolution and less surface damage.
- Contactless Sensors: Sensors based on various principles such as capacitance, inductance, or eddy currents can measure the distance between the sensor and the surface. These are used for in-situ measurements during grinding process.
- Comparison with Standards: The surface roughness is visually compared with roughness standards in certain instances, offering a quick but subjective estimate.
The results are typically expressed using parameters like Ra (average roughness), Rz (ten-point height), or Rq (root mean square roughness). The chosen parameter depends on the specific application and desired level of detail.
Accurate measurement of surface roughness is essential for ensuring quality control and meeting customer specifications. The choice of measuring method should consider factors such as required accuracy, surface characteristics, and the need for a non-destructive measurement.
Q 13. What are the common types of grinding machine malfunctions and their solutions?
Common grinding machine malfunctions and their solutions:
- Excessive Vibration: This can result from worn bearings, imbalance in the grinding wheel, or misalignment of machine components. Solutions involve checking and replacing bearings, balancing the wheel, and realigning the machine as needed.
- Wheel Loading: This occurs when workpiece material clogs the grinding wheel, reducing its efficiency and causing uneven grinding. Solutions include using the correct coolant, increasing the wheel speed, or changing to a more open wheel structure.
- Wheel Glazing: A smooth, glassy surface on the grinding wheel reduces cutting ability. Solutions involve dressing the wheel using a diamond dresser or changing to a fresh wheel.
- Burning: Excessive heat buildup causes material discoloration and surface defects. Solutions involve adjusting the grinding parameters (reducing feed rate or depth of cut), using appropriate coolant, or ensuring sufficient coolant flow.
- Chatter Marks: Unwanted wavy patterns on the workpiece’s surface, often caused by instability in the grinding process. Solutions include adjusting the grinding parameters, improving workpiece clamping, or reducing cutting speed.
- Inaccurate Dimensions: The workpiece is not ground to the required specifications. Solutions involve checking machine alignment, wheel trueness, workpiece clamping, and grinding parameters.
Preventive maintenance, regular inspections, and operator training significantly reduce the incidence of malfunctions. A well-maintained machine is less prone to unexpected issues, leading to increased productivity and higher quality.
Q 14. How do you ensure the accuracy and precision of grinding operations?
Ensuring accuracy and precision in grinding involves several key aspects:
- Machine Calibration and Maintenance: Regular calibration and maintenance are crucial for maintaining machine accuracy. This includes checking machine alignment, wheel trueness, and the accuracy of measuring devices.
- Wheel Selection and Dressing: Choosing the appropriate grinding wheel for the workpiece material and desired finish is essential. Regular dressing of the wheel is necessary to maintain its sharpness and profile.
- Workpiece Preparation and Holding: The workpiece must be properly prepared and securely held to prevent movement during grinding. Improper clamping can lead to inaccurate results.
- Grinding Parameters: Optimizing grinding parameters (speed, feed rate, depth of cut) is crucial for achieving the desired accuracy and surface finish. This often requires careful experimentation and knowledge of material behavior.
- Process Monitoring and Control: Closely monitoring the grinding process and using appropriate feedback mechanisms can ensure consistent results. This might include using sensors to monitor surface roughness or dimensional accuracy.
- Operator Skill and Training: Skilled operators are crucial for achieving high levels of accuracy and precision. Thorough training in grinding techniques, machine operation, and quality control procedures is essential.
Continuous improvement is vital. Regularly reviewing processes and incorporating feedback mechanisms can lead to enhanced accuracy and precision, resulting in improved product quality and reduced waste.
Q 15. Explain the importance of proper work holding techniques in grinding.
Proper work holding is paramount in grinding because it directly impacts the accuracy, surface finish, and safety of the operation. Think of it like this: if you’re trying to carve a precise detail on a piece of wood, you need a firm, stable grip. Similarly, in grinding, if the workpiece isn’t securely held, it can vibrate, shift, or even break, leading to inaccurate dimensions, poor surface quality, and potential injury.
Effective work holding techniques involve using appropriate fixtures, chucks, or magnetic bases designed to match the workpiece’s geometry and the grinding process. For example, a complex part might require a custom fixture with multiple clamping points to ensure even support and prevent distortion. The fixture must also be rigidly mounted to the machine table to minimize vibration. Incorrect clamping can result in uneven wear of the grinding wheel, premature wheel failure, and ultimately, rejection of the workpiece.
Choosing the right work holding method depends on several factors: the workpiece material, its size and shape, the grinding process (e.g., cylindrical grinding, surface grinding), and the desired tolerances. Regularly checking the tightness of the workpiece ensures it remains securely fixed throughout the grinding operation.
Career Expert Tips:
- Ace those interviews! Prepare effectively by reviewing the Top 50 Most Common Interview Questions on ResumeGemini.
- Navigate your job search with confidence! Explore a wide range of Career Tips on ResumeGemini. Learn about common challenges and recommendations to overcome them.
- Craft the perfect resume! Master the Art of Resume Writing with ResumeGemini’s guide. Showcase your unique qualifications and achievements effectively.
- Don’t miss out on holiday savings! Build your dream resume with ResumeGemini’s ATS optimized templates.
Q 16. Describe the different types of grinding fluids and their properties.
Grinding fluids, also known as coolants, play a crucial role in grinding operations. They serve several vital functions, primarily cooling the workpiece and the wheel to prevent overheating and burning, and acting as a lubricant to reduce friction and improve surface finish. Different fluids offer distinct properties:
- Water-based fluids: These are commonly used due to their cost-effectiveness and good cooling capacity. However, they can lead to rusting in certain applications and may not provide sufficient lubrication for demanding operations.
- Oil-based fluids: Offer excellent lubrication and protect against rust, making them suitable for precision grinding where a high surface finish is required. However, they are less effective at cooling than water-based fluids and can be more expensive.
- Synthetic fluids: Provide a balance of cooling and lubrication, often with added benefits such as improved chip evacuation and reduced environmental impact. They are usually more expensive than water or oil-based fluids.
- Specialty fluids: Formulated for specific applications, for instance, grinding hard materials or achieving ultra-precise finishes. These might include additives to enhance specific properties like corrosion inhibition or improved lubricity.
Selecting the appropriate grinding fluid depends on the material being ground, the grinding process, and the desired surface finish. Regular analysis of the fluid’s condition is critical to maintaining its effectiveness and preventing contamination.
Q 17. How do you interpret engineering drawings related to grinding operations?
Interpreting engineering drawings for grinding operations requires a thorough understanding of geometric dimensioning and tolerancing (GD&T) symbols, as well as surface finish specifications. These drawings specify the dimensions of the workpiece, the required tolerances, and the surface finish. For example, a drawing might call for a cylindrical part to be ground to a diameter of 25.000 mm ± 0.005 mm with a surface roughness of Ra 0.4 µm.
The drawing will also indicate the locations for grinding, such as the faces or cylindrical surfaces needing to be processed. It may include additional requirements on specific features, such as chamfers, radii, and parallelism. Understanding the specified allowances, tolerances, and surface quality standards is vital for producing a part that meets the design intent. Any ambiguity should be clarified with the design engineer before proceeding with the grinding operation. Missing or poorly defined information can lead to costly errors in the production process.
Q 18. Explain the concept of in-process gauging in grinding.
In-process gauging in grinding refers to the continuous or frequent monitoring of the workpiece dimensions during the grinding operation. This ensures that the workpiece is being ground to the correct dimensions and prevents the need for extensive rework after the completion of grinding. It’s like continuously checking your progress while baking a cake, rather than just checking at the end – it ensures you catch mistakes early.
This can involve using various measuring tools such as air gauges, dial indicators, or even advanced optical measuring systems. The feedback from these gauging systems is used to adjust the grinding parameters (e.g., wheel feed rate, depth of cut) in real-time, maintaining consistent accuracy and reducing waste. For example, if a diameter is slightly undersized, the feed rate can be reduced, or if it’s oversized, it can be increased to achieve the specified tolerances.
Q 19. What are the effects of incorrect grinding parameters on the workpiece?
Incorrect grinding parameters can have several detrimental effects on the workpiece. These parameters include factors such as wheel speed, feed rate, depth of cut, and the coolant used. Imagine trying to sculpt with a blunt tool at the wrong speed – the result would be far from perfect! Similarly, incorrect parameters can lead to:
- Inaccurate dimensions: If the depth of cut is too deep or the feed rate too fast, the workpiece can be ground undersize or oversized, exceeding the specified tolerances.
- Poor surface finish: Excessive grinding pressure or improper coolant application can result in a rough or burned surface, compromising aesthetic appeal and functionality.
- Workpiece damage: Too aggressive grinding can cause cracks, burns, or even breakage of the workpiece, rendering it unusable.
- Premature wheel wear: Incorrect parameters can cause excessive wear on the grinding wheel, requiring frequent changes and impacting production efficiency.
- Chatter marks: Vibrations caused by incorrect parameters result in uneven surface texture with characteristic chatter marks, reducing precision and affecting the part’s performance.
Careful selection and precise control of grinding parameters are essential for achieving the desired accuracy and surface quality.
Q 20. Describe the process of calibrating grinding machine components.
Calibrating grinding machine components is crucial for ensuring accuracy and repeatability. This involves verifying and adjusting various machine elements to meet specified standards. Imagine a chef calibrating their kitchen scales before weighing ingredients – precision is key! Regular calibration helps prevent inaccurate grinding, ensuring that the final product matches the required specifications.
The specific components requiring calibration depend on the type of grinding machine. Common procedures include:
- Spindle runout check: Measuring the axial and radial runout of the grinding wheel spindle to identify and correct any imbalance or misalignment.
- Table alignment: Checking the squareness and parallelism of the machine table to ensure that the workpiece is accurately positioned relative to the grinding wheel.
- Cross-feed mechanism calibration: Verifying the accuracy of the cross-feed mechanism, which is responsible for controlling the movement of the grinding wheel across the workpiece.
- Wheel truing and dressing: Regularly truing and dressing the grinding wheel to maintain its shape and sharpness. This helps in ensuring consistent grinding performance and surface finish.
- Gauges and measuring equipment verification: Ensuring that the measuring instruments used to check the workpiece dimensions are accurately calibrated.
Calibration procedures usually involve using precision measuring instruments and following manufacturer’s guidelines. Calibration logs should be maintained to track the performance of the machine over time.
Q 21. How do you handle grinding wheel breakage and its implications?
Grinding wheel breakage is a serious safety hazard and can cause significant damage to the machine and the workpiece. It can result from several factors, including excessive centrifugal forces, improper wheel mounting, faulty wheel construction, or collisions with the workpiece. It’s important to treat this as a major incident, ensuring safety and initiating appropriate investigation.
Immediate actions upon wheel breakage include:
- Stopping the machine immediately: This is the top priority to prevent further injury and damage.
- Evacuating the immediate area: Ensuring the safety of personnel.
- Inspecting for damage: Assessing the extent of damage to the machine, workpiece, and surrounding area.
- Reporting the incident: Following established safety procedures to report the incident to appropriate authorities.
- Investigating the cause: Conducting a thorough investigation to determine the root cause of the breakage to prevent future occurrences. This might involve checking the wheel for defects, reviewing the grinding parameters, and inspecting the machine’s components.
Following the incident, the grinding wheel should be replaced with a new one, ensuring proper mounting and alignment. The entire grinding setup should be checked for damage and alignment before restarting operations. Safety precautions should be reviewed and reinforced to avoid similar events in the future.
Q 22. Explain the importance of maintaining grinding machine cleanliness.
Maintaining cleanliness in a grinding machine is paramount for achieving precise tolerances and ensuring the longevity of the equipment. Think of it like a surgeon’s operating room – a clean environment minimizes contamination and potential errors.
- Reduced Contamination: Dirt, debris, and grinding dust can embed themselves in the workpiece, leading to surface imperfections and inaccurate dimensions. This is especially critical in precision grinding where tolerances are extremely tight (e.g., micrometers).
- Improved Wheel Life: A clean machine prevents abrasive particles from clogging the grinding wheel, extending its usable life and maintaining its cutting efficiency. A clogged wheel leads to uneven grinding, reduced material removal rate and increased wear.
- Accurate Measurements: A buildup of debris on measuring devices can lead to inaccurate readings, directly affecting the precision of the final product. Imagine trying to measure a finely machined part with a dirty caliper – the reading would be unreliable.
- Preventing Machine Damage: Dust and debris can damage sensitive machine components, leading to costly repairs or replacements. Regular cleaning prevents premature wear and tear, increasing the operational lifespan of the equipment.
Regular cleaning procedures should include wiping down surfaces, using compressed air to remove loose debris, and periodically cleaning internal components according to the manufacturer’s recommendations.
Q 23. Describe the use of different types of grinding wheel bonds.
Grinding wheel bonds are the material that holds the abrasive grains together, influencing the wheel’s performance and application. The choice of bond depends heavily on the material being ground, the desired finish, and the overall grinding process.
- Vitrified Bonds: This is the most common type, using a ceramic binder that’s fired at high temperatures. Vitrified bonds are strong, durable, and resistant to heat, making them suitable for grinding a wide range of materials, including ferrous and non-ferrous metals.
- Silicate Bonds: These bonds are softer than vitrified bonds and provide a more free-cutting action. They are often used for grinding softer materials or when a finer finish is required.
- Resinoid Bonds: Resinoid bonds are made from synthetic resins and are suitable for high-speed grinding. They offer good strength and are often used in cutting-off wheels and other applications demanding high speeds.
- Shellac Bonds: Shellac bonds are used for delicate grinding operations where a fine finish is critical. However, their fragility limits their use.
- Rubber Bonds: These bonds provide flexibility and are used primarily for grinding soft materials or non-metallic materials.
Selecting the incorrect bond can lead to wheel glazing (loss of cutting ability), premature wear, or even wheel fracturing. The choice of bond is a crucial aspect of optimizing the grinding process for a given application.
Q 24. How do you determine the optimal grinding speed for a particular material?
Determining the optimal grinding speed is crucial for achieving efficient material removal, minimizing heat generation, and preventing wheel and workpiece damage. It’s a balancing act.
The optimal speed depends on several factors:
- Material Hardness: Harder materials generally require lower speeds to prevent excessive heat buildup and workpiece damage. Think of it like cutting a tough steak – you’d use a slower, more controlled motion.
- Wheel Type: Different grinding wheels (grain size, bond type) have different optimal speed ranges specified by the manufacturer. Always consult the wheel’s specifications.
- Workpiece Size and Geometry: Larger workpieces often require lower speeds to manage the heat generated during the grinding process.
- Desired Finish: Finer finishes usually require lower speeds for better control.
Manufacturers provide recommended speed ranges for their grinding wheels, often expressed in surface feet per minute (SFM). Starting within the recommended range and making minor adjustments based on observation (e.g., heat generation, surface finish) is the best approach. Excessive heat is a clear indication the speed is too high.
Q 25. What is the role of workpiece fixturing in precision grinding?
Workpiece fixturing plays a vital role in precision grinding, ensuring that the workpiece is held securely and accurately positioned during the grinding operation. Without proper fixturing, even the most skilled operator will struggle to achieve consistent results.
Key aspects of effective workpiece fixturing include:
- Rigidity: The fixture must be rigid enough to prevent workpiece deflection under grinding forces. Deflection can lead to inconsistencies in the final dimensions and surface finish.
- Accuracy: The fixture must accurately position the workpiece relative to the grinding wheel, ensuring that the desired tolerances are met. Inaccurate positioning will result in inaccurate grinding.
- Repeatability: The fixture must be designed to hold the workpiece consistently in the same position every time, allowing for the repetition of precise grinding operations.
- Accessibility: The fixture should allow for easy access to the grinding area to facilitate efficient material removal and inspection.
Various fixturing methods exist, ranging from simple vices and magnetic chucks to sophisticated CNC-controlled fixtures. The choice of fixture depends on the workpiece’s geometry, material, and the required precision.
Q 26. Explain the concept of centerless grinding.
Centerless grinding is a unique method that doesn’t require a traditional spindle to hold the workpiece. Instead, the workpiece is ground between two rotating wheels: a grinding wheel and a regulating wheel. A third wheel, the work-supporting wheel, can be included to help support the workpiece’s movement and manage the grinding process. It’s often used for high-volume, high-precision cylindrical grinding. Think of it as grinding on a conveyor belt.
Key benefits of centerless grinding include:
- High Production Rates: Workpieces can be fed continuously through the grinding process, leading to high production rates.
- Excellent Surface Finish: Centerless grinding often produces a superior surface finish compared to other methods.
- Consistent Dimensions: The process excels in producing highly consistent cylindrical dimensions.
- Suitable for Small Parts: It’s particularly well-suited for grinding small, cylindrical parts that might be difficult to handle with traditional methods.
However, it’s crucial to correctly set up the regulating and supporting wheels to ensure proper workpiece control and consistent grinding results. Improper setup can result in significant dimensional inconsistencies and workpiece damage.
Q 27. Describe the importance of proper workpiece preparation before grinding.
Proper workpiece preparation is essential for achieving accurate and efficient grinding results. It’s like preparing the canvas before painting a masterpiece – a poor preparation leads to a flawed end product.
Key aspects of workpiece preparation include:
- Cleaning: Removing dirt, grease, and other contaminants from the workpiece’s surface is crucial to ensure proper contact between the grinding wheel and the workpiece. These contaminants can interfere with the grinding process and lead to defects.
- Pre-machining (if necessary): In many cases, pre-machining is necessary to bring the workpiece closer to the final dimensions before precision grinding. This reduces the amount of material that needs to be removed during grinding, and prevents excessive heat and wear.
- Support: Adequate support for the workpiece during the preparation stage prevents warping or damage to the workpiece’s geometry before grinding.
Neglecting workpiece preparation can lead to uneven grinding, inaccurate dimensions, poor surface finish, and even damage to the grinding wheel. It’s an often-overlooked but crucial step for achieving optimal grinding results.
Q 28. How would you address inconsistencies in workpiece dimensions after grinding?
Addressing inconsistencies in workpiece dimensions after grinding requires a systematic approach involving analysis and correction. This is like a detective solving a mystery – you need to identify the root cause.
Steps to address inconsistencies:
- Identify the Source: Analyze the inconsistencies. Are they systematic (consistent errors in a particular direction) or random? Systematic errors indicate a problem with the setup (machine alignment, fixture inaccuracy, etc.), while random errors might suggest problems with wheel wear, workpiece preparation, or operator skill.
- Inspect the Grinding Process: Review the grinding parameters (speed, feed rate, depth of cut) to ensure they are within the recommended range. Inspect the grinding wheel for wear or damage, and check the workpiece fixturing for accuracy and rigidity. Look for any signs of wheel glazing.
- Adjust the Setup: Based on the analysis, adjust the machine setup. This might include recalibrating the machine, replacing worn components, or adjusting the workpiece fixturing.
- Monitor and Repeat: Monitor the grinding process closely to ensure the corrections have been effective. If inconsistencies persist, repeat the analysis and adjustment process.
- Consider Secondary Operations: In some cases, secondary operations like lapping or honing might be necessary to remove minor inconsistencies.
Careful analysis and a systematic approach are key to resolving dimensional inconsistencies. Often, it involves a combination of adjustments to the machine, grinding parameters, and workpiece handling techniques.
Key Topics to Learn for Grind and Shape Tools to Precise Tolerances Interview
- Understanding Tolerances: Mastering the interpretation and application of various tolerance grades (e.g., ISO, ANSI) and their implications on part functionality and quality.
- Grinding Processes: Detailed knowledge of different grinding methods (e.g., cylindrical, surface, centerless) and their suitability for various materials and applications. Understanding the role of grinding wheels, coolants, and machine settings.
- Shaping Processes: Familiarity with different shaping techniques and their applications. This includes understanding the principles of metal removal, tool geometry, and feed rates.
- Precision Measurement Techniques: Proficiency in using various measuring instruments (e.g., micrometers, calipers, CMMs) to verify dimensional accuracy and surface finish.
- Quality Control and Inspection: Understanding quality control procedures, statistical process control (SPC), and common inspection methods used to ensure parts meet specifications.
- Troubleshooting and Problem Solving: Ability to identify and resolve common issues encountered during grinding and shaping operations, including burrs, chatter marks, and dimensional inaccuracies.
- Material Selection and Properties: Knowledge of different materials commonly used in grinding and shaping applications and their impact on the machining process and final part properties.
- Safety Procedures: Understanding and adherence to all relevant safety regulations and procedures related to operating grinding and shaping machinery.
- CNC Programming (if applicable): Experience with programming CNC machines for grinding and shaping operations, including G-code understanding and optimization.
- Tooling and Maintenance: Proper handling, maintenance, and selection of grinding wheels and shaping tools to optimize performance and extend tool life.
Next Steps
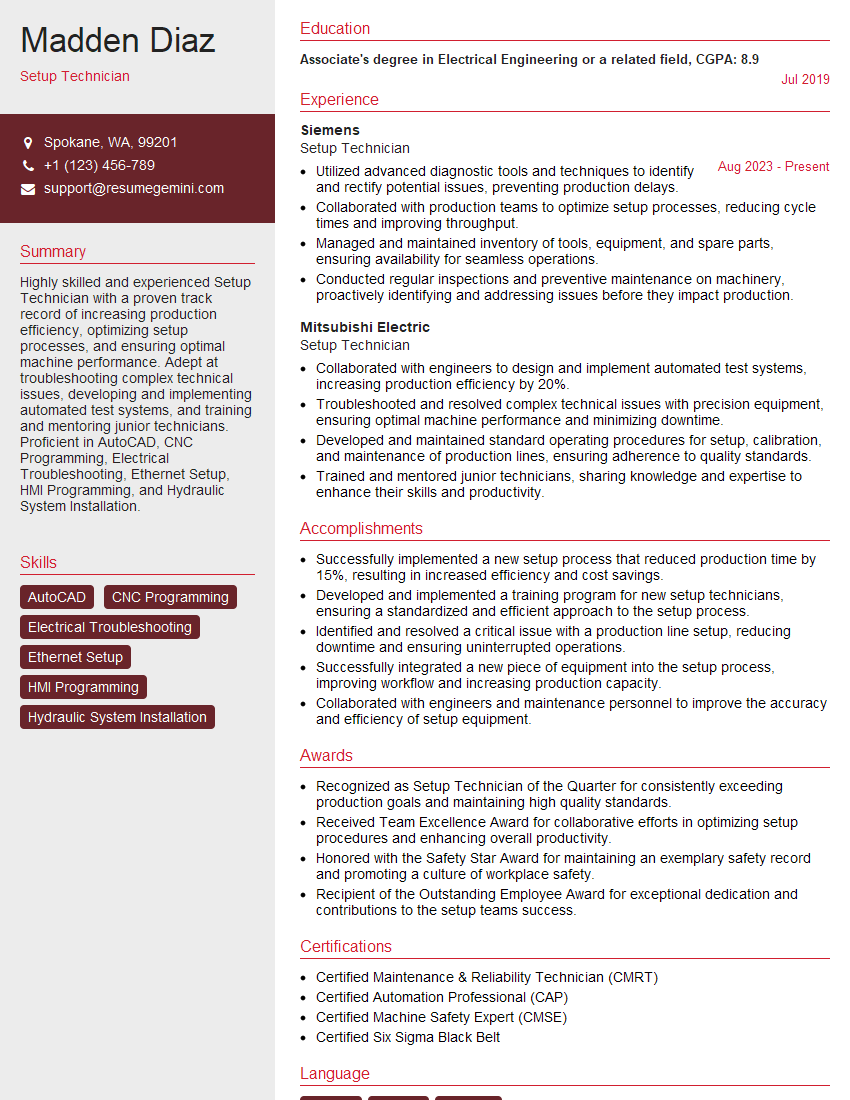
Mastering grind and shape tools to precise tolerances is crucial for advancing your career in manufacturing and engineering. These skills are highly sought after, leading to greater job opportunities and higher earning potential. To maximize your job prospects, create an ATS-friendly resume that effectively highlights your abilities. ResumeGemini is a trusted resource that can help you build a professional resume showcasing your expertise. Examples of resumes tailored to this specific skillset are available to guide you.
Explore more articles
Users Rating of Our Blogs
Share Your Experience
We value your feedback! Please rate our content and share your thoughts (optional).
What Readers Say About Our Blog
Hi, I’m Jay, we have a few potential clients that are interested in your services, thought you might be a good fit. I’d love to talk about the details, when do you have time to talk?
Best,
Jay
Founder | CEO
