Every successful interview starts with knowing what to expect. In this blog, we’ll take you through the top Weighing and Inspectional Services interview questions, breaking them down with expert tips to help you deliver impactful answers. Step into your next interview fully prepared and ready to succeed.
Questions Asked in Weighing and Inspectional Services Interview
Q 1. Explain the different types of weighing scales and their applications.
Weighing scales come in various types, each suited for specific applications. The choice depends on factors like accuracy needed, capacity, and the type of material being weighed.
- Mechanical Scales: These rely on weights and levers for measurement. They’re simple, robust, and often used in less demanding environments, like basic retail settings or in areas with limited power. Think of the classic balance scale used in classrooms for demonstrations.
- Electronic Scales: These use load cells to convert weight into an electrical signal, then displayed digitally. They offer higher accuracy, faster weighing times, and various features like data logging and connectivity. These are prevalent in laboratories, industrial settings, and high-precision applications like pharmaceutical manufacturing.
- Platform Scales: Designed for weighing large items, these feature a large platform and high capacity. Commonly seen in warehouses, shipping yards, and agricultural settings for weighing pallets, vehicles, or bulk materials.
- Truck Scales: These are heavy-duty scales specifically designed for weighing trucks and other large vehicles. Crucial in transportation and logistics for accurate freight billing and weight management.
- Analytical Balances: These are highly precise scales used in laboratories for precise measurements of small masses. Often used in chemistry, pharmaceutical research, and quality control.
- Counting Scales: Used to count items quickly and efficiently by weighing a sample and determining the average weight of a single item. Common in manufacturing and inventory management.
For example, a jeweler would use an analytical balance for weighing precious metals, while a warehouse manager might use a platform scale for weighing pallets of goods.
Q 2. Describe the process of calibrating a weighing scale.
Calibrating a weighing scale ensures its accuracy and reliability. This involves comparing the scale’s readings against known standards (weights) and adjusting it to minimize any discrepancies. The process usually involves these steps:
- Preparation: Ensure the scale is clean, level, and warmed up to its stable operating temperature.
- Verification: Place known test weights (calibrated standards traceable to national standards) on the scale and compare the displayed weight to the known weight. This helps identify any significant errors.
- Adjustment (if necessary): If deviations exceed the acceptable tolerance (specified by the scale’s manufacturer or relevant regulations), adjustments are made using calibration controls typically found on electronic scales. This may involve internal adjustments or external calibration weights depending on the scale’s design.
- Documentation: Record all calibration procedures, including dates, results, and any adjustments made. This documentation forms an integral part of traceability and quality control.
Imagine calibrating a kitchen scale with certified weights. If the scale consistently reads 101 grams when 100 grams is placed, an adjustment is needed to ensure accuracy.
Q 3. What are the common sources of error in weighing measurements?
Several factors can introduce errors in weighing measurements. Understanding these helps ensure accurate results:
- Environmental Factors: Temperature fluctuations, air drafts, and humidity can affect the scale’s readings, especially in sensitive applications.
- Improper Handling: Mishandling the scale (bumps, shocks), or incorrect placement of items can introduce errors.
- Calibration Issues: Out-of-calibration scales will produce inaccurate readings, highlighting the importance of regular calibration.
- Load Cell Drift: Gradual changes in the load cell’s sensitivity can lead to inaccuracy over time. Regular checks are necessary to detect drift.
- Electrostatic Charges: In dry conditions, static electricity can build up, causing inaccuracies, especially when weighing light items.
- Operator Error: Incorrect weighing procedures, such as misreading the display or not correctly zeroing the scale, can lead to inaccurate results.
For example, weighing a hot object on a scale sensitive to temperature changes will lead to an inaccurate reading due to thermal expansion and air currents.
Q 4. How do you ensure the accuracy and traceability of weighing results?
Ensuring accurate and traceable weighing results is paramount for quality control and regulatory compliance. Here’s how:
- Calibration and Verification: Regular calibration using traceable weights ensures accuracy. This traceability links your scale’s calibration to national or international standards.
- Proper Maintenance: Regular cleaning and maintenance prevent errors caused by dirt, dust, or damage.
- Standard Operating Procedures (SOPs): Implementing clear SOPs for weighing procedures, handling samples, and recording data ensures consistency and reduces human error.
- Use of Certified Weights: Using weights that are themselves certified traceable ensures the accuracy of the calibration process.
- Data Logging and Management: Using software to record weights and other relevant information generates audit trails and simplifies data analysis for traceability.
Think of a pharmaceutical company. Accurate weighing is vital for consistent drug dosages. Traceable calibration records demonstrate that their weighing processes meet regulatory requirements.
Q 5. Explain the importance of maintaining accurate weighing records.
Maintaining accurate weighing records is crucial for several reasons:
- Quality Control: Accurate records facilitate trend analysis and identification of potential weighing issues, improving product quality and consistency.
- Regulatory Compliance: Many industries have stringent regulations requiring detailed weighing records for audits and compliance purposes. Missing or inaccurate records can lead to non-compliance penalties.
- Legal Protection: Comprehensive records can protect a company in case of disputes or legal challenges regarding weight-related aspects of their products or services.
- Traceability: Records allow easy tracking of weights and enable quick identification of any discrepancies or errors if problems arise.
- Data Analysis: Records enable analysis to optimize processes, identify potential areas for improvement, and inform business decisions based on accurate weight-related data.
Imagine a food processing facility. Accurate records show the exact weight of ingredients used, ensuring consistent product quality and meeting labeling requirements.
Q 6. Describe your experience with different inspection methods (visual, dimensional, etc.).
My experience encompasses various inspection methods, often used in conjunction with weighing:
- Visual Inspection: This involves a thorough visual examination to identify defects, damage, or contamination. This could involve checking for cracks, discoloration, or foreign objects in materials or products. In food processing, this is vital for quality control and safety.
- Dimensional Inspection: This focuses on measuring the dimensions of an object to ensure it meets specifications. Calipers, micrometers, and other precision measuring instruments are used. In manufacturing, ensuring dimensions are accurate is critical for proper assembly and functionality.
- Weight Inspection: This is, of course, the core of my expertise, ensuring items meet weight specifications or tolerances. This frequently goes hand-in-hand with visual and dimensional checks.
For example, I’ve inspected incoming shipments of raw materials, verifying their weight and visually checking for damage before accepting delivery. In another instance, I was involved in quality control for a manufacturing line, checking both the weight and dimensions of manufactured parts.
Q 7. How do you handle discrepancies found during weighing or inspection?
Handling discrepancies requires a systematic approach:
- Identify the Discrepancy: Determine the exact nature and magnitude of the discrepancy. Was the weight incorrect? Were there visible defects?
- Investigate the Root Cause: Investigate the source of the error. Was it due to equipment malfunction, operator error, or other factors?
- Implement Corrective Actions: Take steps to rectify the issue. This could involve recalibrating equipment, retraining personnel, or modifying processes.
- Document the Process: Thoroughly document the discrepancy, investigation, and corrective actions taken. This demonstrates proper quality control practices and helps prevent future issues.
- Escalate as Necessary: Depending on the severity of the discrepancy, escalate the issue to management or regulatory authorities.
For instance, if a batch of products is consistently underweight, investigation might reveal a problem with the filling machine or an issue with the raw materials. Corrective actions could include repair/replacement of the machine and improved quality control of the materials.
Q 8. What are your knowledge of relevant safety regulations and procedures?
Safety is paramount in weighing and inspectional services. My knowledge encompasses a wide range of regulations, including OSHA (Occupational Safety and Health Administration) guidelines for workplace safety, relevant industry-specific standards (e.g., those set by the National Institute of Standards and Technology – NIST for measurement accuracy), and company-specific safety protocols. These regulations cover various aspects, from the proper use of personal protective equipment (PPE) like safety glasses and gloves when handling potentially hazardous materials, to safe operation of weighing equipment and procedures for handling heavy loads. For example, I’m trained in lockout/tagout procedures to prevent accidental equipment start-up during maintenance or repairs, and I understand the importance of following specific protocols for working at heights if using elevated platforms for inspections. Furthermore, I’m familiar with emergency procedures and know how to react safely in case of accidents or equipment malfunctions. This includes knowing the location of fire extinguishers, emergency exits, and the proper communication channels to report incidents.
Q 9. Explain your understanding of Good Weighing Practices (GWP).
Good Weighing Practices (GWP) are a set of principles designed to ensure the accuracy, reliability, and traceability of weighing results. Think of it like a recipe for perfect measurements – following it ensures consistent, dependable outcomes. GWP encompasses several key areas. Firstly, it stresses the importance of properly calibrating and maintaining weighing equipment. Regular calibration, using certified weights, is crucial for eliminating systematic errors. I have extensive experience with various calibration techniques, from simple weight checks to complex multi-point calibrations, depending on the type of scale and regulatory requirements. Secondly, GWP emphasizes environmental factors – factors like temperature and humidity can affect the accuracy of measurements. Proper environmental control, or at least recording and accounting for environmental variations, is critical. Thirdly, GWP advocates for appropriate handling of samples and equipment to prevent contamination and damage that may influence results. This also involves documentation – meticulous records of every step in the process, including calibration details, environmental conditions and any observations – are crucial for traceability and verification. Finally, GWP encompasses proper training and competency of personnel to ensure consistent and accurate results. A well-trained operator knows how to read a scale accurately, account for environmental factors, and understand limitations.
Q 10. How do you identify and address potential hazards in a weighing or inspection environment?
Hazard identification in weighing and inspection involves a systematic approach. I typically employ a combination of techniques, including pre-inspection walkthroughs, reviewing work orders for specific hazards, and utilizing job safety analysis (JSA) to anticipate potential issues. For example, in a warehouse setting, potential hazards might include unstable stacking of materials near scales, uneven flooring which could compromise scale stability, or exposure to hazardous substances requiring proper PPE. Addressing these hazards involves implementing control measures. This might involve relocating unstable materials, ensuring level flooring, proper ventilation and using the correct PPE. Beyond the immediate environment, other factors like equipment malfunction, electrical hazards, and even ergonomic concerns (e.g., repetitive strain injuries from manual handling) need to be considered. My process typically involves documenting the identified hazards, the control measures implemented, and verification of the effectiveness of these measures to ensure safety compliance.
Q 11. Describe your experience with using different types of inspection tools.
My experience extends to a wide range of inspection tools. This includes various types of scales, from simple platform scales used for weighing smaller items to crane scales capable of weighing heavy loads, and even specialized scales for specific applications such as moisture content measurement. Beyond scales, I’ve used calipers, micrometers, and other precision measuring instruments for dimensional inspection. In addition, I’m proficient in using non-destructive testing (NDT) tools depending on the requirements of a given inspection job, for instance, ultrasonic testing (UT) or magnetic particle inspection (MPI). Furthermore, I’m experienced using various software applications for data acquisition and analysis. The choice of tool depends entirely on the nature of the material being inspected and the type of information required. My experience allows me to select and efficiently operate the most appropriate tools in various situations.
Q 12. How do you document your findings during an inspection?
Thorough documentation is crucial for traceability and accountability. My documentation practices typically involve creating detailed inspection reports. These reports include a description of the equipment inspected, the methods used, the date and time of the inspection, and any deviations observed from standards. This is often supplemented by photographic or video evidence. For weighing-specific inspections, I document scale calibration details, environmental conditions during weighing, the weight of the samples, any observed anomalies or uncertainties, and a clear statement of whether the weighing equipment passed or failed inspection. All findings are clearly recorded, and any discrepancies are noted with supporting evidence. This comprehensive documentation aids in identifying trends, preventing future issues, and ensuring compliance with regulatory requirements.
Q 13. How do you communicate inspection results to relevant parties?
Communication of inspection results is tailored to the audience and the nature of the findings. For simple, straightforward findings, a concise email or verbal report may suffice. However, more complex or critical findings would necessitate a detailed written report, possibly with a presentation to the relevant personnel. My communication strategy ensures clarity, objectivity, and actionable recommendations. For instance, if a piece of weighing equipment has failed inspection, I would not only state the failure, but also suggest corrective actions and potentially a timeline for repair or replacement. This approach focuses on collaboration and problem-solving rather than simply reporting failures. Regardless of the method, I emphasize clear, unambiguous language, avoiding technical jargon unless absolutely necessary, and maintaining professionalism throughout the process.
Q 14. Explain your experience with different types of weighing equipment (e.g., platform scales, crane scales).
My experience with weighing equipment is extensive and includes various types, each with its own nuances and applications. I’m comfortable operating and maintaining platform scales of different capacities, understanding the importance of level surfaces and appropriate weight distribution for accurate readings. I’ve also worked with crane scales, which involve additional safety considerations due to the involvement of heavy loads and lifting equipment. This requires knowledge of load limits, proper hook attachment techniques, and understanding of potential hazards associated with these larger-scale weighing operations. Furthermore, my experience includes using electronic scales, which usually provide digital readouts and often have features for data logging and connectivity, which streamline data acquisition and analysis. I’m also familiar with less common types of scales depending on the industry application and can adapt my expertise appropriately, always prioritizing safety and accuracy in any weighing operation.
Q 15. How do you handle non-conforming materials or products?
Handling non-conforming materials or products involves a systematic approach focused on identifying the root cause, containing the issue, and implementing corrective actions to prevent recurrence. It’s crucial to follow established procedures, often documented in a quality manual.
- Identification and Segregation: Immediately isolate the non-conforming material, clearly labeling it to prevent accidental use or mixing with conforming product. This might involve physically separating it or using a specialized tracking system.
- Root Cause Analysis: We conduct a thorough investigation to determine why the non-conformity occurred. This could involve reviewing weighing records, inspecting equipment, checking raw materials, or interviewing personnel. Tools like 5 Whys or fishbone diagrams are helpful.
- Corrective Action: Once the root cause is identified, we implement corrective actions to address it. This could involve equipment recalibration, process adjustments, retraining personnel, or sourcing materials from a different supplier.
- Disposition: We decide on the appropriate action for the non-conforming material. Options include repair, rework, scrapping, or using it for a lower-grade application. This decision considers cost, safety, and regulatory compliance.
- Documentation: The entire process, from initial identification to final disposition, is meticulously documented. This record provides traceability and assists in continuous improvement efforts. For example, we maintain a non-conformance report that includes detailed information about the incident, the investigation, the corrective actions taken, and the verification that those actions were effective.
For example, if we discover a batch of ingredients consistently underweight, we’d investigate if the scales need recalibration, if the filling process is faulty, or if there’s an issue with ingredient consistency from the supplier.
Career Expert Tips:
- Ace those interviews! Prepare effectively by reviewing the Top 50 Most Common Interview Questions on ResumeGemini.
- Navigate your job search with confidence! Explore a wide range of Career Tips on ResumeGemini. Learn about common challenges and recommendations to overcome them.
- Craft the perfect resume! Master the Art of Resume Writing with ResumeGemini’s guide. Showcase your unique qualifications and achievements effectively.
- Don’t miss out on holiday savings! Build your dream resume with ResumeGemini’s ATS optimized templates.
Q 16. What is your understanding of statistical process control (SPC) as it relates to weighing and inspection?
Statistical Process Control (SPC) is a powerful tool for monitoring and controlling the variation in a process, ensuring that it remains stable and predictable. In weighing and inspection, SPC helps us identify potential problems *before* they lead to significant non-conformances.
We use control charts, like X-bar and R charts, to track the average weight and the range of weights for a sample of products. By plotting these data points, we can observe trends and identify points outside the control limits, indicating a potential problem. For example, a sudden upward trend in average weight might signal a problem with the filling equipment.
Example: An X-bar and R chart for monitoring the weight of a product. Points outside the upper or lower control limits indicate process instability that needs investigation.
SPC allows for proactive problem-solving, reducing waste, improving efficiency, and ultimately enhancing product quality and consistency. The early detection of trends and deviations enables timely intervention, preventing large-scale quality issues.
Q 17. Describe your experience with data analysis related to weighing and inspection results.
Data analysis is integral to my work. I use various tools and techniques to interpret weighing and inspection results, identify trends, and improve processes. My experience encompasses using software such as spreadsheet programs (Excel, Google Sheets) and specialized statistical software (Minitab, JMP) for analyzing data.
- Descriptive Statistics: I calculate measures like mean, standard deviation, and range to summarize the data and assess the variability in weighing results. This helps identify potential issues in weight consistency.
- Control Charts: As mentioned earlier, I build and interpret control charts (X-bar, R, p, etc.) to monitor process stability and identify shifts or trends that indicate potential problems.
- Hypothesis Testing: I use statistical tests to determine if there are significant differences between different samples or groups, for example, to compare the accuracy of different weighing scales or to assess the impact of process changes.
- Data Visualization: I create charts and graphs to visualize the data and identify patterns or trends more easily. This facilitates communication of findings to stakeholders.
For instance, I might analyze data to identify whether a specific weighing scale is consistently producing inaccurate results compared to others, indicating a need for calibration or repair. Or, I could analyze data on rejected products to identify common defects and pinpoint the source of the problems in the production process. Data-driven decision-making is key to improving efficiency and minimizing errors.
Q 18. How do you ensure compliance with relevant industry standards and regulations?
Ensuring compliance with industry standards and regulations is paramount. This involves staying updated on relevant legislation, implementing appropriate procedures, maintaining accurate records, and undergoing regular audits.
- Knowledge of Standards: I have a deep understanding of relevant standards, such as ISO 9001 (Quality Management Systems), GMP (Good Manufacturing Practices) – if applicable to the industry, and any industry-specific regulations pertaining to weighing and measurement accuracy. This includes understanding tolerance limits and traceability requirements.
- Calibration Procedures: We maintain a rigorous calibration schedule for all weighing equipment, using traceable standards. Calibration certificates are meticulously documented and stored.
- Record Keeping: All weighing data, inspection reports, and calibration records are kept in a secure and organized manner. This ensures traceability and aids in any future investigation or audit.
- Internal Audits: Regular internal audits assess compliance with established procedures and identify areas for improvement. These findings are documented and corrective actions implemented.
- External Audits: We cooperate fully with external audits conducted by regulatory bodies or clients to demonstrate compliance.
For example, in the pharmaceutical industry, precise weighing is critical, and deviations from standards can have serious consequences. We ensure our procedures meet or exceed standards like GMP and relevant regulatory requirements for weighing and documentation.
Q 19. Describe a time you had to troubleshoot a problem with weighing equipment.
During a routine weighing check, we noticed one of our precision balances was consistently producing readings slightly lower than expected. The first step was to check for obvious issues, like a level surface and ensuring the balance was properly calibrated.
After verifying these basics, we used the balance’s built-in diagnostic tools to check for internal errors. We also performed a known weight check using calibrated weights. The diagnostic tools showed no internal errors, but the known weight check confirmed the balance was reading slightly low. The next step was to carefully examine the balance for any physical damage or wear.
We discovered a small amount of dust accumulation on the weighing pan, which, after cleaning, resolved the issue. We then recalibrated the balance to confirm accuracy. This incident underscored the importance of regular cleaning and maintenance procedures for weighing equipment. We added more frequent cleaning checks to our preventative maintenance schedule.
Q 20. How do you prioritize tasks when faced with multiple inspection responsibilities?
Prioritizing tasks involves a structured approach considering urgency, importance, and impact. I use a combination of techniques:
- Urgency/Importance Matrix: Categorizing tasks based on urgency and importance allows me to focus on high-impact tasks first. Urgent and important tasks take priority. Urgent but less important tasks are delegated or scheduled appropriately.
- Workload Assessment: Regularly reviewing my workload helps me anticipate potential bottlenecks and adjust my schedule accordingly. This includes considering deadlines and resource availability.
- Time Management Techniques: I utilize techniques like time blocking and the Pomodoro Technique to improve focus and efficiency. This helps break down larger tasks into smaller, manageable chunks.
- Communication and Delegation: Open communication with supervisors and colleagues ensures I’m aware of changing priorities and allows for appropriate task delegation.
An example would be prioritizing a critical batch of materials requiring immediate weighing and inspection over a routine equipment calibration that can be scheduled later in the week, but still within the planned maintenance window.
Q 21. How do you handle situations where there is pressure to compromise on quality or accuracy?
Compromising quality or accuracy is never acceptable. My commitment is unwavering. If pressured to do so, I would:
- Document the Pressure: I would clearly and precisely document the source and nature of the pressure, including the individuals involved. This ensures I have a record if the situation escalates.
- Explain the Risks: I would clearly articulate the potential risks and consequences of compromising quality or accuracy, highlighting potential financial, safety, and reputational damage.
- Escalate the Issue: If the pressure persists, I would escalate the matter to my supervisor or a higher authority within the company. This allows for an impartial review and resolution.
- Maintain Professionalism: Throughout the process, I would remain professional, calm, and firm in my commitment to maintaining quality and integrity.
My ethical obligation is to ensure the accuracy and reliability of our weighing and inspection services. Shortcuts are unacceptable, and potentially disastrous for product quality and customer trust.
Q 22. Describe your experience with different types of inspection reports.
Inspection reports are the cornerstone of documenting the findings of weighing and inspectional services. They vary greatly depending on the industry, the specific product, and the regulations involved. I’ve had extensive experience with several types, including:
Non-Conformance Reports (NCRs): These detail any discrepancies found during the inspection that don’t meet predetermined standards. For example, an NCR might detail underweight packages of a pharmaceutical product, specifying the batch number, the number of affected units, and the severity of the deviation.
Calibration Reports: These verify the accuracy of weighing equipment. They document the calibration process, including the weights used, the date of calibration, and any adjustments made to ensure the scale remains within acceptable tolerances. Imagine a truck scale used for transporting grain; a regular calibration report is crucial to ensure fair transactions.
Quality Control Reports: These summarize the overall quality of a batch or shipment after inspection. They might include pass/fail metrics, percentages of defects, and overall conclusions about the product’s fitness for its intended use. Think of a food processing plant; quality control reports are vital for food safety and compliance.
Audit Reports: These are more comprehensive documents summarizing findings from a complete audit of weighing and inspection processes within an organization. They assess compliance with regulations, identify areas for improvement, and make recommendations. These are often required by regulatory bodies.
The common thread is that all reports must be clear, concise, objective, and traceable to specific data and procedures. I always ensure my reports are easily understandable by both technical and non-technical audiences.
Q 23. What software or systems are you familiar with for managing weighing and inspection data?
Throughout my career, I’ve become proficient with several software systems used for managing weighing and inspection data. This includes:
LIMS (Laboratory Information Management Systems): These systems are widely used in laboratories and industrial settings to manage samples, tests, results, and related data. I’ve used LIMS software to track sample weights, record inspection results, and generate reports. This allows for streamlined data management and efficient analysis.
ERP (Enterprise Resource Planning) Systems: These integrate various business functions, including inventory management and quality control. I’ve worked with ERP systems to integrate weighing data directly into inventory tracking, providing real-time visibility into stock levels and quality.
Dedicated Weighing Software: Many scales and weighing systems come with their own dedicated software that allows for data logging, reporting, and even automated quality checks. I am familiar with various software packages from different manufacturers, understanding their strengths and weaknesses.
Spreadsheet Software (Excel): While not a dedicated system, spreadsheets are valuable for simpler weighing and inspection tasks, especially for data entry and basic analysis. However, for large-scale operations, dedicated systems offer much better efficiency and traceability.
My expertise extends beyond simply using these systems; I also understand the importance of data integrity, data security, and proper validation of the software used to ensure accurate and reliable results.
Q 24. Explain your understanding of the different types of inspection sampling techniques.
Inspection sampling techniques are crucial for efficiently and accurately assessing the quality of a large batch or shipment. Different techniques are appropriate for different situations. Here are a few key methods I frequently use:
Random Sampling: Every item in the batch has an equal chance of being selected. This is good for representing the overall population but might miss localized issues.
Stratified Sampling: The batch is divided into subgroups (strata), and samples are taken from each subgroup proportionally. This is useful when there are known variations within the batch (e.g., different production runs). Imagine inspecting a large shipment of produce; you might stratify by origin to account for regional variations in quality.
Systematic Sampling: Samples are selected at regular intervals. This is efficient but may miss patterns if there’s a cyclical variation in quality.
Acceptance Sampling: A predetermined number of samples are inspected, and the batch is either accepted or rejected based on the number of defects found. This is common in quality control processes and often follows specific standards (e.g., military standards).
The choice of sampling technique depends on factors like the size of the batch, the acceptable level of defects, the cost of inspection, and the risks associated with faulty products. I always select the method that provides the most representative and reliable results.
Q 25. How do you maintain proficiency in your weighing and inspection skills?
Maintaining proficiency is a continuous process. I achieve this through several key strategies:
Continuing Education: I regularly attend workshops, seminars, and webinars focused on advancements in weighing technology, inspection techniques, and relevant regulations. This ensures I stay abreast of the latest developments in the field.
Professional Certifications: I hold relevant certifications demonstrating my competence and commitment to professional standards. These certifications often require periodic renewal, necessitating ongoing learning and skill development.
Hands-on Practice: Practical experience is invaluable. I actively seek opportunities to apply my skills in various real-world situations, encountering different challenges and refining my techniques.
Self-Study: I regularly review relevant literature, technical manuals, and industry best practices to reinforce my understanding and stay updated on new developments.
Mentorship and Collaboration: I actively engage with colleagues and experts in the field, discussing challenges, sharing best practices, and learning from each other’s experiences.
Proficiency in this field isn’t just about knowing how to operate a scale; it’s about understanding the implications of accurate measurements, ensuring data integrity, and adhering to industry best practices.
Q 26. Describe your experience with training others in weighing and inspection procedures.
I’ve had considerable experience training others in weighing and inspection procedures. My approach is always practical and hands-on, focusing on building a strong foundational understanding before progressing to more complex tasks. I typically follow a structured approach:
Needs Assessment: Before starting any training, I assess the trainees’ existing knowledge and the specific skills they need to acquire.
Theory and Principles: I provide a clear explanation of the underlying principles of weighing and inspection, including sources of error, calibration techniques, and relevant regulations.
Practical Demonstration: I demonstrate the proper use of equipment and techniques, emphasizing correct procedures and safety precautions.
Hands-on Practice: Trainees get ample opportunity to practice their skills under supervision, providing feedback and guidance.
Assessment and Feedback: I regularly assess trainees’ progress, providing constructive feedback and addressing any questions or concerns.
Documentation and Resources: I provide written materials, checklists, and other resources to reinforce learning and ensure consistency.
For example, when training new inspectors at a pharmaceutical facility, I emphasized the importance of GMP (Good Manufacturing Practices) in all weighing and inspection procedures, using real-life examples of non-compliance and their consequences. The goal is to empower them to perform their tasks accurately, efficiently, and safely.
Q 27. How do you stay updated on changes in relevant regulations and best practices?
Staying updated is vital in this field due to the ever-evolving regulatory landscape and technological advancements. My strategies include:
Subscription to Industry Publications and Journals: I subscribe to relevant trade publications and journals to stay informed about new regulations, best practices, and technological advancements.
Membership in Professional Organizations: I actively participate in professional organizations related to weighing and inspection, attending conferences, networking with peers, and accessing their resources.
Regulatory Agency Websites: I regularly check the websites of relevant regulatory agencies (e.g., FDA, NIST) for updates on regulations, guidance documents, and enforcement actions.
Online Courses and Webinars: I utilize online learning platforms to enhance my knowledge of specific techniques and regulations.
Networking: Maintaining connections with colleagues and experts allows me to learn about emerging trends and challenges in the industry.
For instance, recent changes in food safety regulations prompted me to dedicate additional time to understanding and implementing the updated guidelines. Proactive monitoring and continuous learning ensures I can effectively advise clients and ensure compliance.
Key Topics to Learn for Weighing and Inspectional Services Interview
- Weight Measurement Principles: Understanding different weighing methods (static, dynamic), calibration techniques, and sources of error in weighing processes. Practical application: Troubleshooting discrepancies in weight readings and ensuring accuracy in various weighing equipment.
- Inspection Procedures and Standards: Familiarity with relevant industry regulations, quality control protocols, and documentation requirements. Practical application: Conducting thorough inspections, identifying non-conformances, and preparing accurate inspection reports.
- Data Analysis and Reporting: Proficiency in analyzing weighing data, identifying trends, and generating comprehensive reports. Practical application: Using statistical methods to interpret data, creating visualizations to communicate findings, and identifying areas for process improvement.
- Equipment Maintenance and Calibration: Knowledge of preventative maintenance schedules, calibration procedures, and troubleshooting common equipment malfunctions. Practical application: Performing routine maintenance tasks, ensuring equipment accuracy, and minimizing downtime.
- Safety Procedures and Regulations: Understanding and adhering to relevant safety protocols and regulations related to weighing and inspection processes. Practical application: Implementing safe work practices, using appropriate safety equipment, and identifying potential hazards.
- Quality Control and Assurance: Implementing and maintaining quality control systems to ensure product conformity and customer satisfaction. Practical application: Developing and implementing quality control plans, conducting internal audits, and investigating customer complaints.
Next Steps
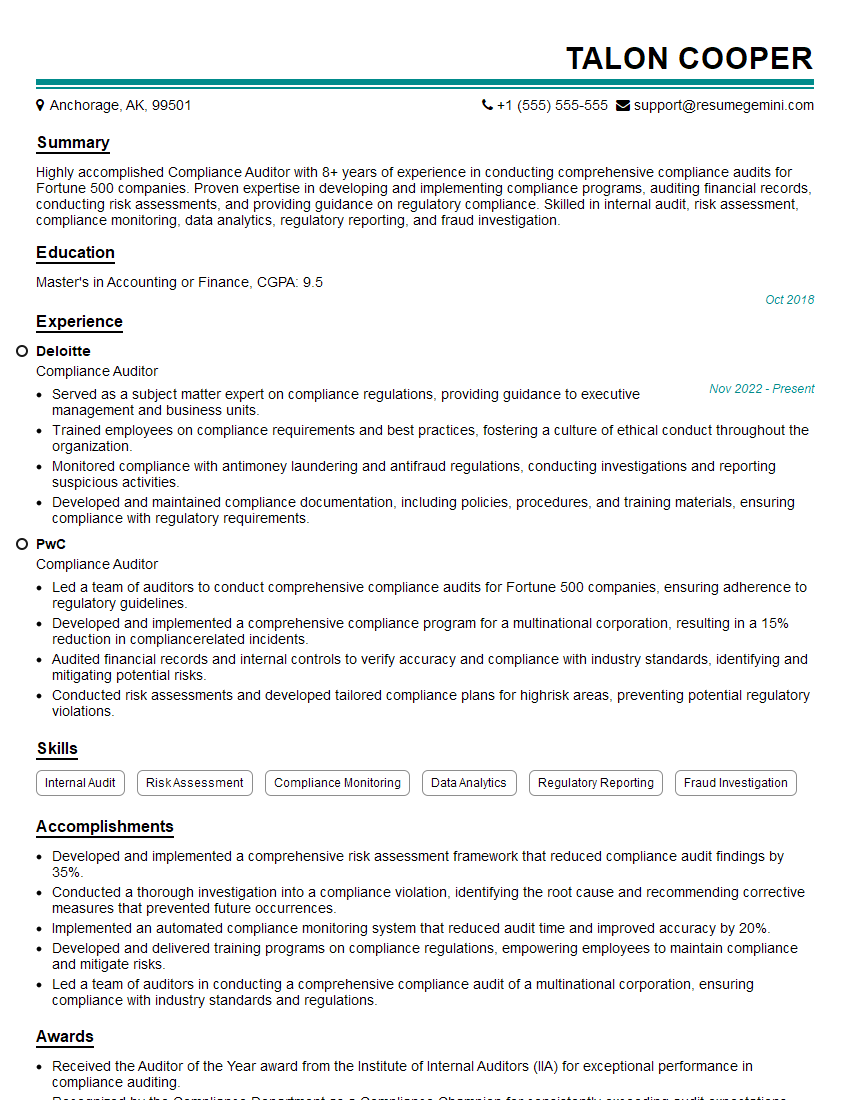
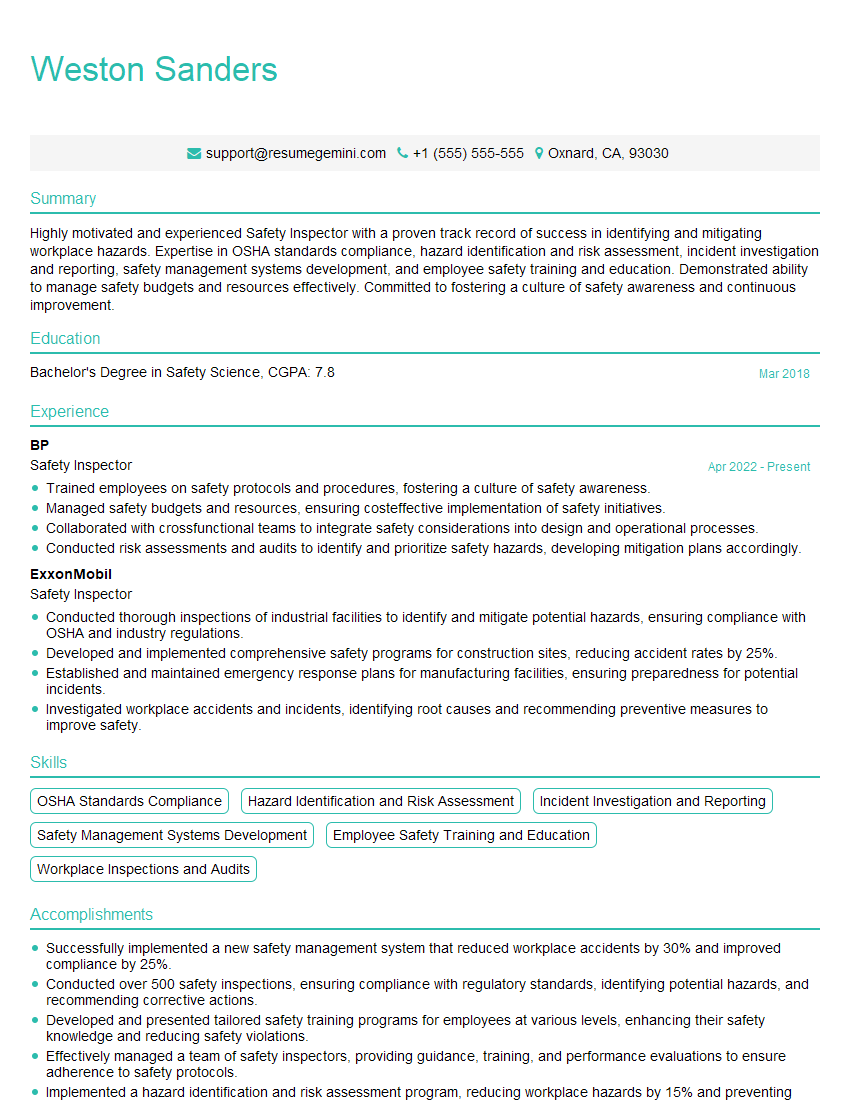
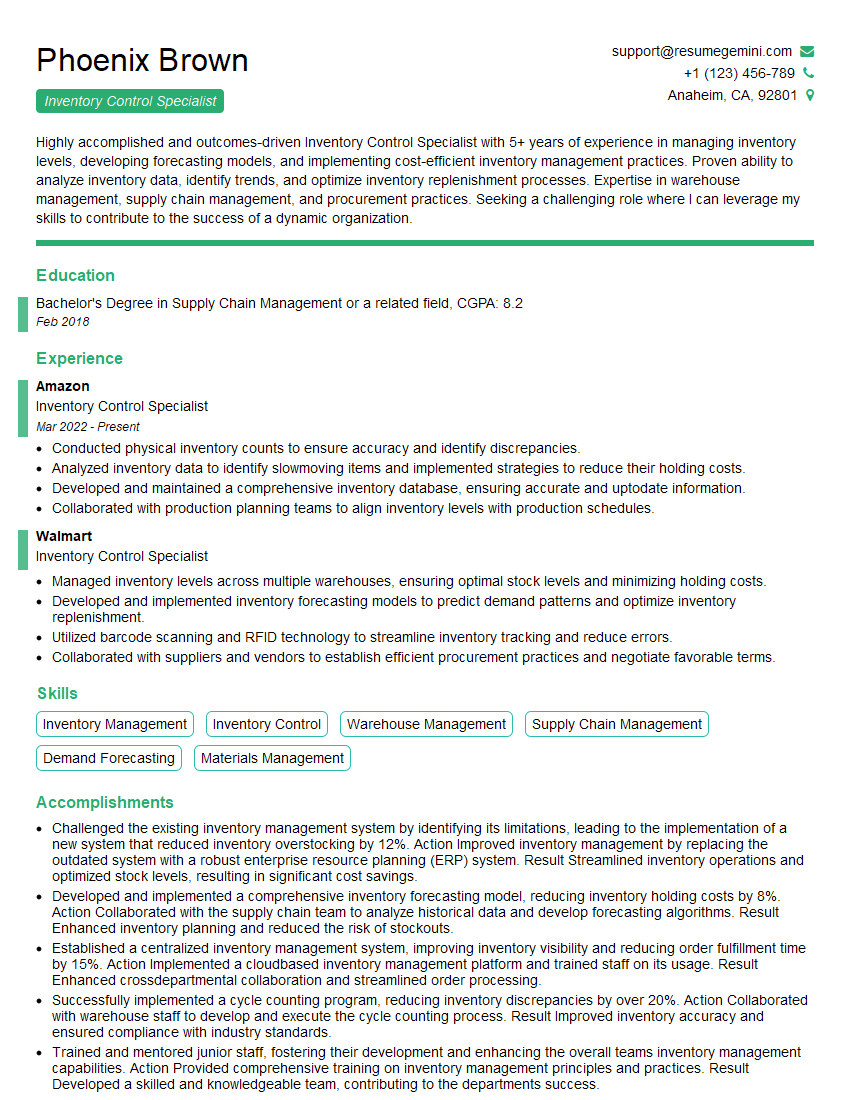
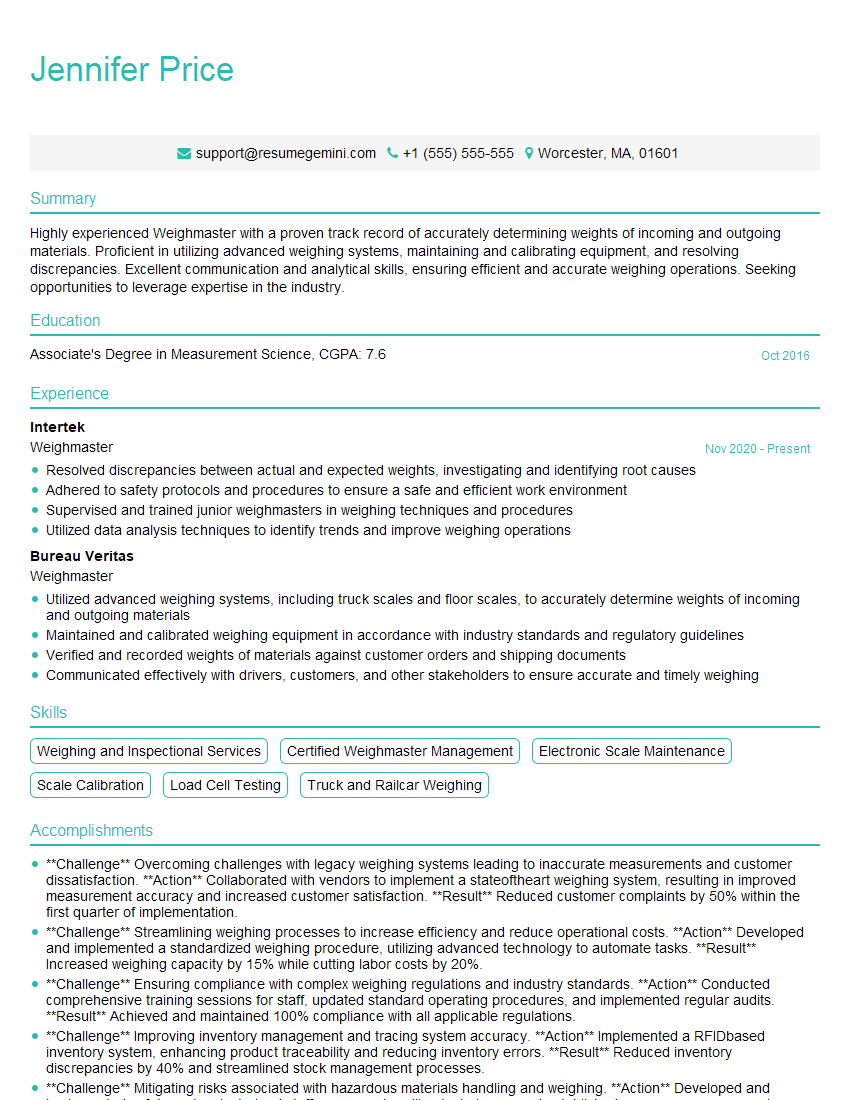
Mastering Weighing and Inspectional Services opens doors to rewarding careers in diverse industries, offering opportunities for advancement and specialization. A strong resume is crucial for showcasing your skills and experience to potential employers. Creating an ATS-friendly resume is key to ensuring your application gets noticed. To build a professional and effective resume, we recommend using ResumeGemini, a trusted resource that helps you craft compelling narratives that highlight your achievements. Examples of resumes tailored to Weighing and Inspectional Services are available to help you get started. Take the next step in your career journey today!
Explore more articles
Users Rating of Our Blogs
Share Your Experience
We value your feedback! Please rate our content and share your thoughts (optional).
What Readers Say About Our Blog
I Redesigned Spongebob Squarepants and his main characters of my artwork.
https://www.deviantart.com/reimaginesponge/art/Redesigned-Spongebob-characters-1223583608
IT gave me an insight and words to use and be able to think of examples
Hi, I’m Jay, we have a few potential clients that are interested in your services, thought you might be a good fit. I’d love to talk about the details, when do you have time to talk?
Best,
Jay
Founder | CEO

